## https://sploitus.com/exploit?id=KITPLOIT:TOOLS-GITHUB-OLAFHAALSTRA-LOG4JCHECK
# Log4j CVE-2021-44228 检测器
多线程检测 URL 列表,支持 `POST` 和 `GET` 请求并附带参数。
大量灵感来源于 NortwaveSecurity 版本。
# 设置
## 待检测的 URL
待检测的 URL 列表应采用以下格式(`csv`):
root@kitploit:~
description,URL,method,parameters
production,example.com/login,POST,"username,password"
staging,example.com/search,GET,"q"
development,example.com/,GETNP,""
随后将在 `example.com/login` 上执行 `POST` 请求,请求体如下: `username={jndi:ldap...}&password={jndi:ldap...}`
类似地,将执行以下 `GET` 请求:`example.com/search?q={jndi:ldap...}`。
或者,你可以指定 `GETNP`(`GET` `N`o `P`arameters),即对 URL 追加 payload 后执行 `GET`:`example.com/new/{jndi:ldap...}`。
此外,payload 也会插入到 `User-Agent`、`Referer`、`X-Forwarded-For`、`Authentication` 请求头中,以增加命中几率。
如果需要对同一 URL 同时进行 `GET`、`POST` 或 `GETNP` 检测,请在 CSV 中复制该条目。
## Canary Token
无需任何预先配置即可使用 https://canarytokens.org/generate 生成一个 Log4Shell CanaryToken:
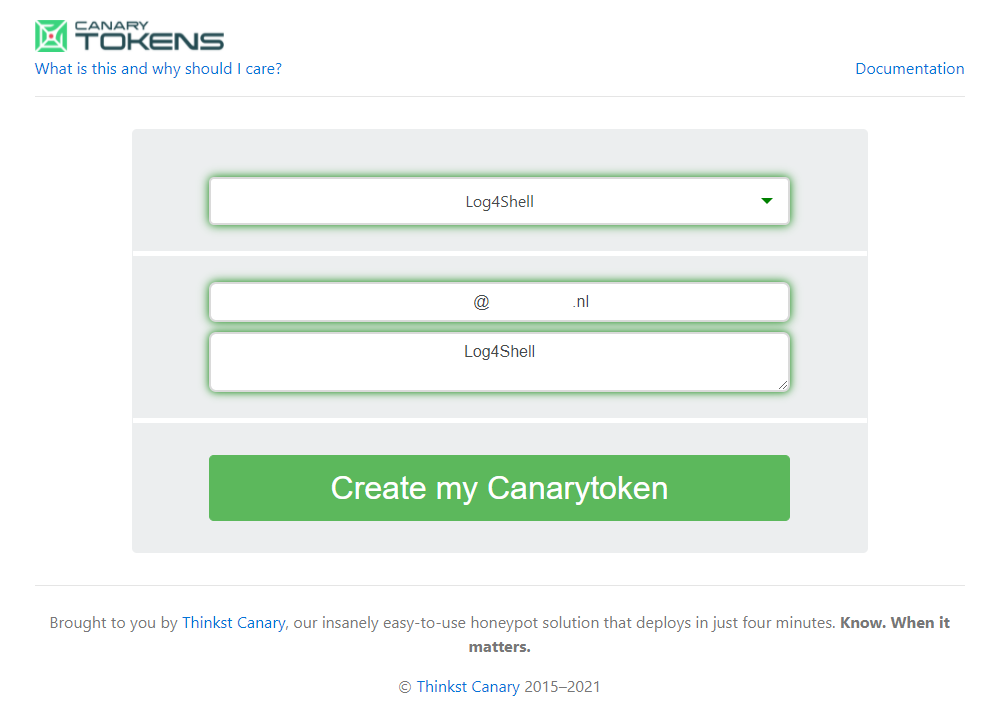
或者,你也可以搭建自己的 DNS 服务器。
# 运行脚本
使用 `pip install -r requirements.txt` 安装依赖。编辑脚本,将以下行修改为你偏好的 canary token:
root@kitploit:~
usage: log4jcheck.py [-h] -f FILE -u URL [-w WAIT] [-t TIMEOUT] [-p PREFIX] [-q THREADS] [-d DONE]
optional arguments:
-h, --help show this help message and exit
-f FILE, --file FILE The CSV filename containing the URLs
-u URL, --url URL DNS subdomain URL on which th callback is performed
-w WAIT, --wait WAIT Number of seconds to wait before next request (default: 1)
-t TIMEOUT, --timeout TIMEOUT
HTTP timeout in seconds to use (default: 5)
-p PREFIX, --prefix PREFIX
Type of prefix, see prefixes_injects for options. (default: 0, options 0-3)
-q THREADS, --threads THREADS
Number of threads to distribute the work
-d DONE, --done DONE File where we can keep track of items that are done
创建 `/run/logs` 目录用于输出日志。日志将记录在这里,不会输出到 `stdout`。
现在可以运行脚本,指定之前创建的 CSV 文件以及待检测的 URL。
root@kitploit:~
python3 .\log4jcheck.py --file .\urls-example.csv --threads 2 --url "L4J.ujz5sgvgo7xuvn03ft9qrws5w.canarytokens.com/a" -w 0 -t 1
脚本执行完成后,检查 token 是否被触发。你可以根据生成的 `UUID4` 与注入参数进行交叉关联,例如:`40852c3b-2d6b-4bd5-a91f-4416aa730619-username`。
## 测试
已针对 log4shell-vulnerable-app 进行测试。按如下方式修改 `MainController.java`:
root@kitploit:~
package fr.christophetd.log4shell.vulnerableapp;
import org.springframework.web.bind.annotation.GetMapping;
import org.springframework.web.bind.annotation.PostMapping;
import org.springframework.web.bind.annotation.RequestHeader;
import org.springframework.web.bind.annotation.RequestBody;
import org.springframework.web.bind.annotation.RequestParam;
import org.springframework.web.bind.annotation.RestController;
import org.apache.logging.log4j.LogManager;
import org.apache.logging.log4j.Logger;
@RestController
public class MainController {
private static final Logger logger = LogManager.getLogger("HelloWorld");
@GetMapping("/")
public String index(@RequestHeader("X-Api-Version") String apiVersion) {
logger.info("Received a request for API version " + apiVersion);
return "Hello, world!";
}
@GetMapping("/test")
public String testGet(@RequestParam String test) {
logger.info("Received a request for test " + test);
return "Test world!";
}
@PostMapping("/test")
public String test(@RequestBody String test) {
logger.info("Received a request for test " + test);
return "Test world!";
}
}
编译并运行:
root@kitploit:~
gradle bootJar --no-daemon
java -jar .\build\libs\log4shell-vulnerable-app-0.0.1-SNAPSHOT.jar
使用以下 `urls.csv` 文件运行 `log4jcheck`:
root@kitploit:~
description,URL,method,parameters
test,http://localhost:8080/test,POST,"test"
test,http://localhost:8080/test,GET,"test"
在 canary token 日志中应看到如下信息: 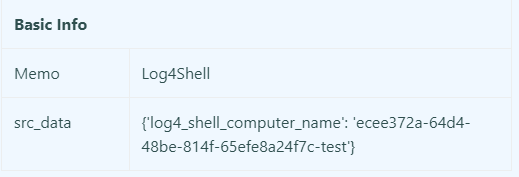
## 覆盖范围:
覆盖以下 HTTP 请求头:
* `X-Api-Version`
* `User-Agent`
* `Referer`
* `X-Druid-Comment`
* `Origin`
* `Location`
* `X-Forwarded-For`
* `Cookie`
* `X-Requested-With`
* `X-Forwarded-Host`
* `Accept`
对于每次注入,可使用以下 JNDI 前缀:
* 0: `jndi:dns`
* 1: `jndi:${lower:l}${lower:d}ap`
* 2: `jndi:rmi`
* 3: `jndi:ldap`
## 免责声明
请注意,该脚本只检测: _User-Agent_ 和你指定的 `POST` 或 `GET` 请求参数。如果漏洞需要通过其他请求头、遗漏的输入字段等才能触发,则会产生漏报。欢迎向脚本添加额外的检测。
## 许可证
Log4jcheck 基于 MIT 许可证开源。